주요 콘텐츠로 건너뛰기
수리 커뮤니티 가입 - 계정 만들기

Nokia 2630b Antenna Replacement

필요한 것

  1. Nokia 2630b Antenna Replacement, Battery Case: 1 단계, 이미지 2개 중 1개 Nokia 2630b Antenna Replacement, Battery Case: 1 단계, 이미지 2개 중 2개
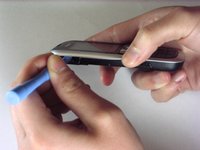
    • Press and the release button on both sides of the battery cover. While holding down the release buttons pull the battery cover away from the phone

  2. Nokia 2630b Antenna Replacement: 2 단계, 이미지 1개 중 1개
    • Pull out the battery by holding the top of the battery and tilting out.

  3. Nokia 2630b Antenna Replacement, Screen / Front Case: 3 단계, 이미지 1개 중 1개
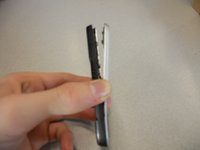
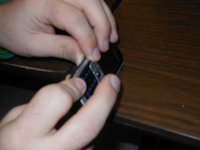
    • Remove the two screws on either side of the battery case using a T5 Torx screwdriver.

  4. Nokia 2630b Antenna Replacement: 4 단계, 이미지 3개 중 1개 Nokia 2630b Antenna Replacement: 4 단계, 이미지 3개 중 2개 Nokia 2630b Antenna Replacement: 4 단계, 이미지 3개 중 3개
    • Separate the front case from the back case using the iPod opener.

    • The keypad is a loose piece and may fall out.

  5. Nokia 2630b Antenna Replacement: 5 단계, 이미지 1개 중 1개
    • Remove screws using the T5 Torx screwdriver to release the computer chip from the case.

  6. Nokia 2630b Antenna Replacement: 6 단계, 이미지 1개 중 1개
    • Carefully lift the black frame off the screen with your fingers.

  7. Nokia 2630b Antenna Replacement: 7 단계, 이미지 1개 중 1개
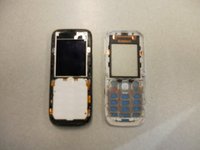
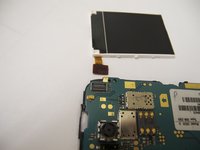
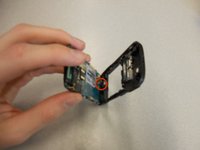
    • Carefully remove the computer chip and screen out of the black case with your fingers.

  8. Nokia 2630b Antenna Replacement: 8 단계, 이미지 2개 중 1개 Nokia 2630b Antenna Replacement: 8 단계, 이미지 2개 중 2개
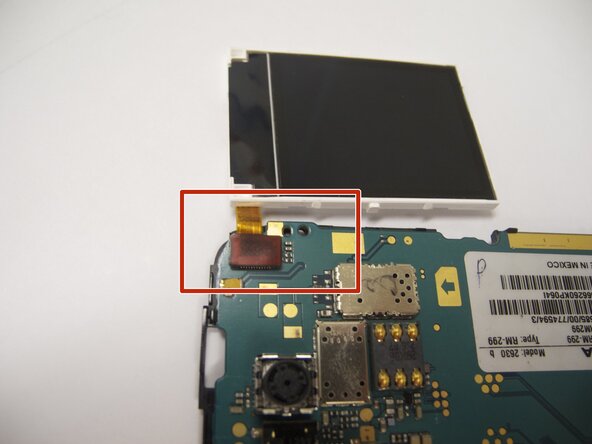
    • The screen is attached to the motherboard by an orange ribbon.

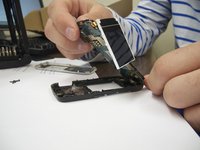
    • Carefully detach the ribbon from the motherboard using your fingers.

  9. Nokia 2630b Antenna Replacement: 9 단계, 이미지 1개 중 1개
    • Reattach new screen by connecting the orange ribbon to the computer chip.

  10. Nokia 2630b Antenna Replacement: 10 단계, 이미지 2개 중 1개 Nokia 2630b Antenna Replacement: 10 단계, 이미지 2개 중 2개
    • Place computer chip and screen back into black case.

  11. Nokia 2630b Antenna Replacement: 11 단계, 이미지 1개 중 1개
    • Place black frame back over screen.

  12. Nokia 2630b Antenna Replacement: 12 단계, 이미지 2개 중 1개 Nokia 2630b Antenna Replacement: 12 단계, 이미지 2개 중 2개
    • Carefully place keypad back in place.

  13. Nokia 2630b Antenna Replacement: 13 단계, 이미지 2개 중 1개 Nokia 2630b Antenna Replacement: 13 단계, 이미지 2개 중 2개
    • Snap the front case back in place with the bottom case with your fingers.

  14. Nokia 2630b Antenna Replacement: 14 단계, 이미지 1개 중 1개
    • Reassemble screws with microscrewdriver.

  15. Nokia 2630b Antenna Replacement: 15 단계, 이미지 1개 중 1개
    • Slide battery back into place.

  16. Nokia 2630b Antenna Replacement: 16 단계, 이미지 1개 중 1개
    • Snap battery cover back into place.

  17. Nokia 2630b Antenna Replacement, Back Case: 17 단계, 이미지 2개 중 1개 Nokia 2630b Antenna Replacement, Back Case: 17 단계, 이미지 2개 중 2개
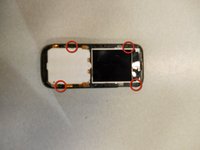
    • Locate the four screws that secure the back case to the rest of the phone.

    • Unscrew all four screws using a "T-5" star shaped screw driver, turning counter-clockwise.

  18. Nokia 2630b Antenna Replacement: 18 단계, 이미지 3개 중 1개 Nokia 2630b Antenna Replacement: 18 단계, 이미지 3개 중 2개 Nokia 2630b Antenna Replacement: 18 단계, 이미지 3개 중 3개
    • DO NOT PULL APART! There is a wire attaching the speaker to the rear case. It is very important to NOT sever this connection. Because of this, the rear case does not completely detach from the rest of the phone.

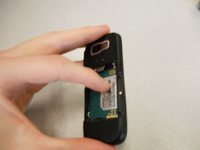
    • Holding the rear case, applying pressure to the back of the phone near the location of the battery in order to separate the two components.

  19. Nokia 2630b Antenna Replacement, Antenna: 19 단계, 이미지 1개 중 1개
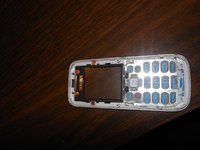
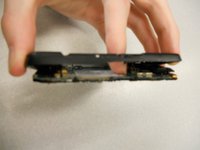
    • The antenna is the "L" shaped device located on the top of the phone in between the back case and the board.

    • You should be able to remove the antenna with minimal effort.

    • To put in a new antenna, place it in the same location as the old one. There is no need to connect to any hardware on the phone.

  20. Nokia 2630b Antenna Replacement: 20 단계, 이미지 1개 중 1개
    • To reassemble the device, follow the instructions in reverse order.

    • When reinstalling the keyboard, make sure it is in the correct position before screwing the case back together.

    • When reinstalling the battery, make sure the contacts of the battery connect to the contacts on the phone.

    • Double-check the position of the brass contacts in relation to the battery.

    • The photo displays the correct orientation of the battery.

결승점

작성자

11다른 기여자 명과 함께

Eric

회원 가입일: 04/07/11

57 평판

안내서 4개를 작성함

Cal Poly, Team 9-61, Walters Spring 2011 Cal Poly, Team 9-61, Walters Spring 2011 회원

CPSU-WALTERS-S11S9G61

5 회원들

안내서 6개를 작성함

0가이드 댓글

댓글 쓰기

조회 통계:

지난 24시간: 4

지난 7일: 9

지난 30일: 34

전체 시간: 3,808