주요 콘텐츠로 건너뛰기
수리 커뮤니티 가입 - 계정 만들기

Nokia 8390 SIM Card Replacement

필요한 것

  1. Nokia 8390 SIM Card Replacement, Back Cover: 1 단계, 이미지 1개 중 1개
    • Locate the button on the bottom of the back cover.

  2. Nokia 8390 SIM Card Replacement: 2 단계, 이미지 3개 중 1개 Nokia 8390 SIM Card Replacement: 2 단계, 이미지 3개 중 2개 Nokia 8390 SIM Card Replacement: 2 단계, 이미지 3개 중 3개
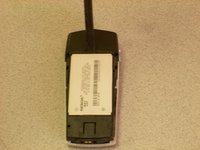
    • Depress the button with your finger.

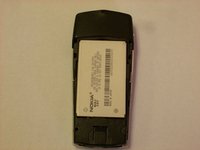
    • While the button is depressed, slide the back cover off of the phone.

  3. Nokia 8390 SIM Card Replacement, Battery: 3 단계, 이미지 2개 중 1개 Nokia 8390 SIM Card Replacement, Battery: 3 단계, 이미지 2개 중 2개
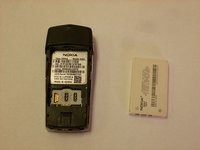
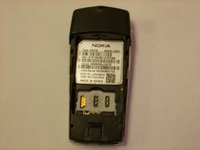
    • Place the phone so that the battery is face up.

    • Insert a screwdriver or spudger into the crevice above the battery.

  4. Nokia 8390 SIM Card Replacement: 4 단계, 이미지 2개 중 1개 Nokia 8390 SIM Card Replacement: 4 단계, 이미지 2개 중 2개
    • Use a screwdriver or spudger to lift the battery out of the casing.

  5. Nokia 8390 SIM Card Replacement, SIM Card: 5 단계, 이미지 2개 중 1개 Nokia 8390 SIM Card Replacement, SIM Card: 5 단계, 이미지 2개 중 2개
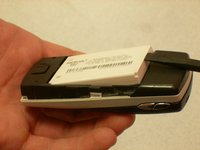
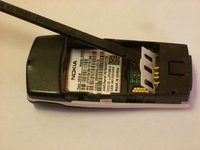
    • Place the spudger under the plastic cover and lightly lift.

    • Insert the SIM Card under the plastic cover and close.

결론

To reassemble your device, follow these instructions in reverse order.

작성자

4다른 기여자 명과 함께

Clinton

회원 가입일: 10/22/12

57 평판

안내서 7개를 작성함

Clemson, Team 14-5, Benson Fall 2012 Clemson, Team 14-5, Benson Fall 2012 회원

CLEM-BENSON-F12S14G5

3 회원들

안내서 21개를 작성함

0가이드 댓글

댓글 쓰기

조회 통계:

지난 24시간: 0

지난 7일: 1

지난 30일: 4

전체 시간: 343