필요한 것
-
-
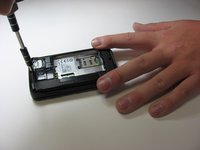
Remove the back cover by locating the slit on the bottom of the phone and lifting up.
-
-
-
-
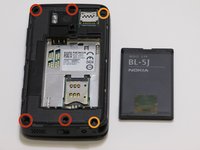
Remove the two "L-shaped" antennas by unscrewing the following screws:
-
Four screw M1 .4x5.0
-
Two screw RF1 .4x4
-
In addition to unscrewing the screws, remove the B-Cover (which will fall right out without the screws).
-
-
-
Turn the back of the phone over so the keyboard is face up. You should then have two halves of the phone.
-
To locate the slider, find the "black tape" on the screen half of the phone.
-
Weave the "slider tape" through the orange slot on the keyboard half of the phone.
-
Once you have completed these steps your phone should be able to slide up and down with ease.
-


To reassemble your device, follow these instructions in reverse order.
다른 한 분이 해당 안내서를 완성하였습니다.
팀

New Mexico State, Team 1-4, Easley Spring 2014 New Mexico State, Team 1-4, Easley Spring 2014 회원
NMSU-EASLEY-S14S1G4
4 회원들
안내서 12개를 작성함