소개
This replacement guide will save you from having to buy a new phone by showing you how to replace the motherboard of your Nokia XL Dual SIM Android Smartphone.
필요한 것
-
-
You will first need to separate the back cover from the device.
-
Gently pry open each side of the device at the indicated locations. It is best to use a plastic opening tool or similar tool.
-
-
-
Remove the back cover.
-
Use a plastic opening tool to lift the battery. Then, remove it.
-
-
-
To access the inner components of the device, remove the various screws. Keep them separate, and organize them by size.
-
The locations of the T5x3.4mm screws are indicated in the picture.
-
The locations of the T5x4.1mm screws are indicated in the picture.
-
-
-
-
Use the plastic opening tool to gently pry the device apart.
-
There are flaps on both sides of the phone as indicated in the picture. This is what you will need to pry apart.
-
-
-
With tweezers, gently unsnap the motherboard connectors for all components.
-
-
-
The 3 motherboard connectors for the touchscreen, volume buttons, and power/screen lock button assembly are indicated on the picture.
-
The touchscreen assembly can now be removed and set aside.
-
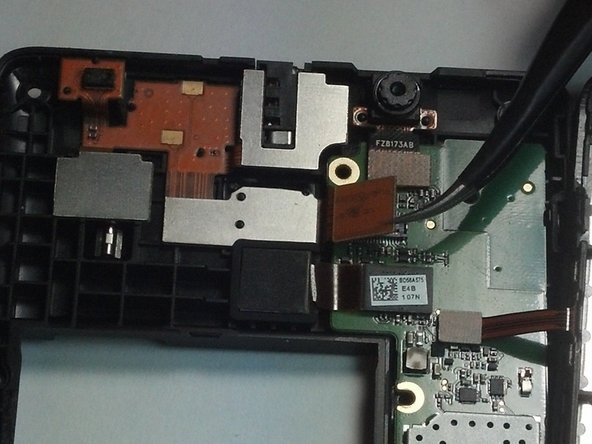
The motherboard connector for the front camera is indicated on the picture.
-
The motherboard connector for the camera flash, vibrator, and headphone jack assembly is indicated in the picture.
-
The motherboard connector for the front camera is indicated on the picture.
-
-
-
Gently pry up on the top underside of the motherboard with the small plastic opening tool.
-
Gently pulling upward on the motherboard will allow it to be removed.
-


To reassemble your device, follow these instructions in reverse order.
To reassemble your device, follow these instructions in reverse order.
다른 8명이 해당 안내서를 완성하였습니다.

팀

USF Tampa, Team 1-4, Brown Fall 2014 USF Tampa, Team 1-4, Brown Fall 2014 회원
USFT-BROWN-F14S1G4
3 회원들
안내서 7개 작성하였습니다
댓글 3개
I removed my charging system while removing the charger from the phone after that i sgave it to phone repaire to insert a new charging system ,When my phone was ready he gave it to me,After i switched it on it turned bluish incolour the whole screen,so what can i do pls?
jmwachofi8 - 답글