주요 콘텐츠로 건너뛰기
수리 커뮤니티 가입 - 계정 만들기

Nook Tablet Midframe Replacement

필요한 것

    1. Nook Tablet Midframe Replacement, Back Cover: 1 단계, 이미지 1개 중 1개
      • Flip the Nook over.

      댓글 쓰기

    2. Nook Tablet Midframe Replacement: 2 단계, 이미지 2개 중 1개 Nook Tablet Midframe Replacement: 2 단계, 이미지 2개 중 2개
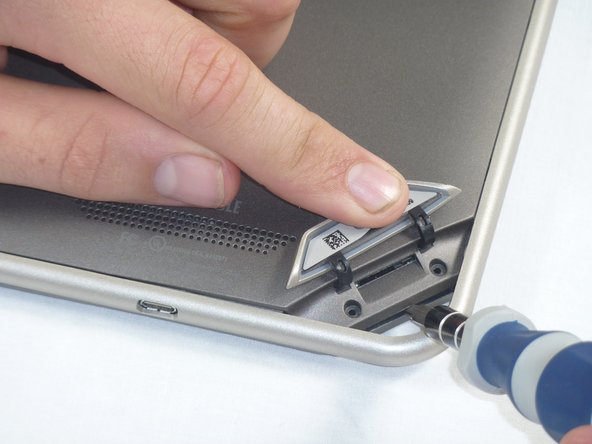
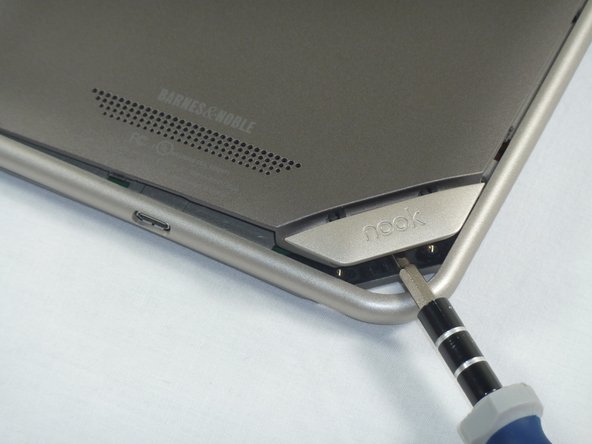
      • Lift the flap that reads "Nook" to reveal the tape that is underneath. Remove the memory card if one is present.

      • Remove the tape covering the round holes to reveal two T5 Torx screws.

      • Remove the two T5 Torx screws securing the back cover.

      댓글 쓰기

    3. Nook Tablet Midframe Replacement: 3 단계, 이미지 2개 중 1개 Nook Tablet Midframe Replacement: 3 단계, 이미지 2개 중 2개
      • Insert the flat end of a spudger between the front panel and the rear assembly.

      • Though these photos show a screwdriver, use a spudger or plastic opening tool in order to prevent damage to the device.

      • Use a spudger to lift the the back panel from the rest of the Nook.

      댓글 쓰기

    4. Nook Tablet Midframe Replacement: 4 단계, 이미지 2개 중 1개 Nook Tablet Midframe Replacement: 4 단계, 이미지 2개 중 2개
      • Slide the spudger around the edges of the Nook to loosen the back panel.

      댓글 쓰기

    5. Nook Tablet Midframe Replacement: 5 단계, 이미지 1개 중 1개
      • Pull the back panel off the Nook.

      댓글 쓰기

    1. Nook Tablet Midframe Replacement, Screen Bezel: 6 단계, 이미지 2개 중 1개 Nook Tablet Midframe Replacement, Screen Bezel: 6 단계, 이미지 2개 중 2개
      • Using the T5 Torx screwdriver, remove the ten T5 screws from around the edges of the silver midframe.

      댓글 쓰기

    2. Nook Tablet Midframe Replacement: 7 단계, 이미지 2개 중 1개 Nook Tablet Midframe Replacement: 7 단계, 이미지 2개 중 2개
      • Using a spudger or plastic opening tool, carefully pry the screen bezel away from the silver midframe.

      댓글 쓰기

    1. Nook Tablet Midframe Replacement, Disconnect the Battery: 8 단계, 이미지 2개 중 1개 Nook Tablet Midframe Replacement, Disconnect the Battery: 8 단계, 이미지 2개 중 2개
      • Lift up the foam pad at the corner of the battery to reveal the battery connector.

      • Use a spudger or plastic opening tool to disconnect the battery cable from the motherboard.

      • These photos show a screwdriver, but we recommend using a nonconductive tool like a spudger to prevent a potential short.

      댓글 쓰기

    1. Nook Tablet Midframe Replacement, Midframe: 9 단계, 이미지 1개 중 1개
      • Lift up the foam that covers the power connector and volume connector.

      • Disconnect the power and volume cables from their sockets on the motherboard.

      댓글 쓰기

    2. Nook Tablet Midframe Replacement: 10 단계, 이미지 2개 중 1개 Nook Tablet Midframe Replacement: 10 단계, 이미지 2개 중 2개
      • Carefully lift the silver midframe away from the motherboard and display assembly.

      • Be careful when handling the motherboard, making sure to not dislodge/shift any of its major components.

      댓글 쓰기

결론

To reassemble your device, follow these instructions in reverse order.

취소: 해당 안내서를 완성하지 않았습니다.

작성자

1다른 기여자 명과 함께

Holly Lowe

회원 가입일: 09/26/12

238 평판

안내서 3개를 작성함

0가이드 댓글

댓글 쓰기

조회 통계:

지난 24시간: 0

지난 7일: 1

지난 30일: 27

전체 시간: 755