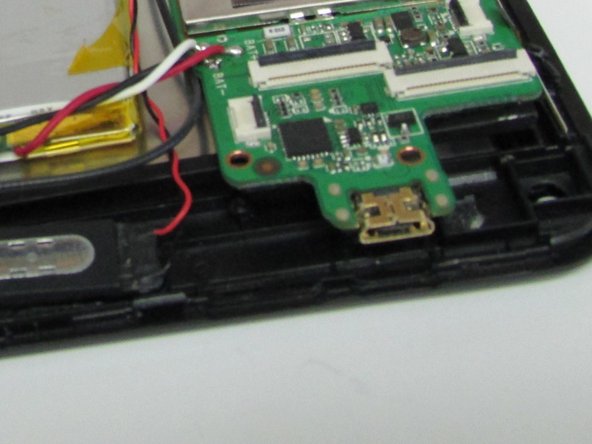
주요 콘텐츠로 건너뛰기

NuVision TM800A510L Charging Port Replacement

필요한 것

  1. NuVision TM800A510L Charging Port Replacement, Charging Port: 1 단계, 이미지 1/2 NuVision TM800A510L Charging Port Replacement, Charging Port: 1 단계, 이미지 2/2
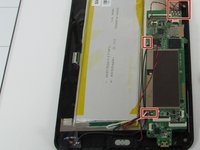
    • Use a Heat Gun to loosen the adhesive on the underside of the back cover.

    • Use some prying tools to lift the back cover off of the device.

    • I recommend heating up the device up to 'just barely too hot to touch' and then prying sides up one at a time.

    • Although, you can use either plastic or metal prying tools, metal prying tools may scratch the device. Make sure not to damage power and volume buttons when prying the cover off as well.

  2. NuVision TM800A510L Charging Port Replacement: 2 단계, 이미지 1/1
    • Unscrew the motherboard.

  3. NuVision TM800A510L Charging Port Replacement: 3 단계, 이미지 1/1
    • Make sure all ribbons are disconnected.

  4. NuVision TM800A510L Charging Port Replacement: 4 단계, 이미지 1/2 NuVision TM800A510L Charging Port Replacement: 4 단계, 이미지 2/2
    • Desolder the Motherboard- this will make it easier to get to the charging port without breaking any cords.

    • Flip the Motherboard over and desolder the charging port from Motherboard.

결론

To reassemble your device, follow these instructions in reverse order.

Kelsey Riggs

회원 가입일: 01/25/17

486 평판

안내서 5개 작성하였습니다

댓글 0개

댓글 쓰기

조회 통계:

24 시간 전: 0

7일 전: 6

30일 전: 9

전체 시간: 1,931