주요 콘텐츠로 건너뛰기
수리 커뮤니티 가입 - 계정 만들기

Numark TT1600 Audio Jacks Replacement

필요한 것

  1. Numark TT1600 Audio Jacks Replacement, Audio Jacks: 1 단계, 이미지 1개 중 1개
    • Flip over the turntable and remove the nine screws on the outer edges.

  2. Numark TT1600 Audio Jacks Replacement: 2 단계, 이미지 2개 중 1개 Numark TT1600 Audio Jacks Replacement: 2 단계, 이미지 2개 중 2개
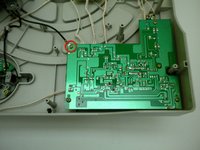
    • Find the audio jacks located on the back side of the turntable.

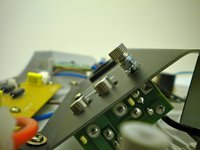
    • Remove the screw located in between the right and left audio jacks.

  3. Numark TT1600 Audio Jacks Replacement: 3 단계, 이미지 1개 중 1개
    • Remove the back cover by pulling it apart.

  4. Numark TT1600 Audio Jacks Replacement: 4 단계, 이미지 1개 중 1개
    • Remove the grounding hardware located next to the audio jacks.

  5. Numark TT1600 Audio Jacks Replacement: 5 단계, 이미지 2개 중 1개 Numark TT1600 Audio Jacks Replacement: 5 단계, 이미지 2개 중 2개
    • Remove the ground screw and washers.

  6. Numark TT1600 Audio Jacks Replacement: 6 단계, 이미지 1개 중 1개
    • Remove the remaining nut and washer.

  7. Numark TT1600 Audio Jacks Replacement: 7 단계, 이미지 1개 중 1개
    • Remove the screw located on the back panel of the audio jack housing.

  8. Numark TT1600 Audio Jacks Replacement: 8 단계, 이미지 3개 중 1개 Numark TT1600 Audio Jacks Replacement: 8 단계, 이미지 3개 중 2개 Numark TT1600 Audio Jacks Replacement: 8 단계, 이미지 3개 중 3개
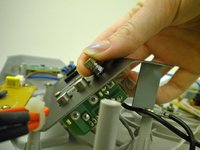
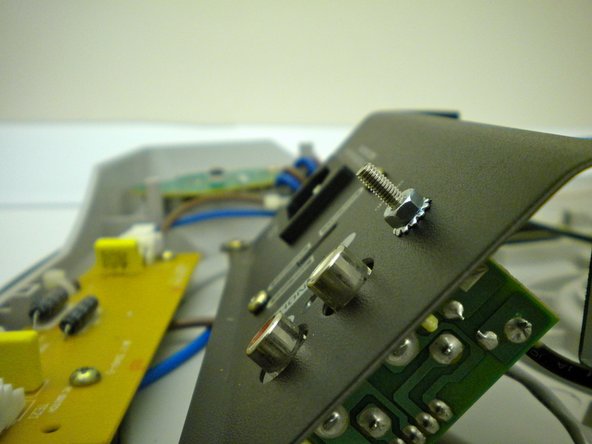
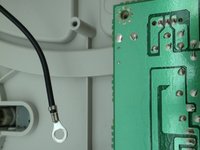
    • Remove the screw that connects the audio jacks to the biggest circuit board via wire.

  9. Numark TT1600 Audio Jacks Replacement: 9 단계, 이미지 1개 중 1개
    • Gently pull out the audio input jacks from the audio input housing.

결론

To reassemble your device, follow these instructions in reverse order.

다른 한 분이 해당 안내서를 완성하였습니다.

작성자

4다른 기여자 명과 함께

Nikolai

회원 가입일: 10/12/11

254 평판

안내서 5개를 작성함

Cal Poly, Team 17-14, Regan Fall 2011 Cal Poly, Team 17-14, Regan Fall 2011 회원

CPSU-REGAN-F11S17G14

4 회원들

안내서 11개를 작성함

0가이드 댓글

댓글 쓰기

조회 통계:

지난 24시간: 2

지난 7일: 8

지난 30일: 22

전체 시간: 1,552