소개
If your charging port, USB ports, ethernet port, or HDMI port on your Nvidia Shield Pro Android TV are not working properly, use this guide to help remove/replace your I/O board on your Nvidia Shield Pro. The only tools required for this procedure are the T6 Torx screwdriver and the plastic opening tool. Some steps may be difficult due to the cluster of screws and wires to be located, but do not fret, this guide will help you locate all the parts you need to remove.
필요한 것
-
-
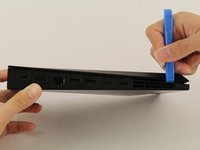
Flip to the back side of your Nvidia Shield Pro Android TV.
-
To open the bottom cover of the Nvidia Shield, start from the corner and slide your plastic opening tool across the gap.
-
If using a plastic opening tool to open the bottom cover is difficult, try using a metal spudger.
 FixBot에 문의하기
-
-
-
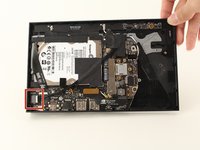
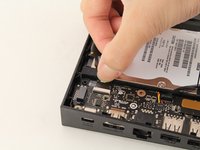
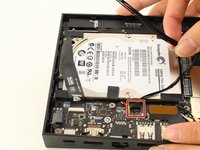
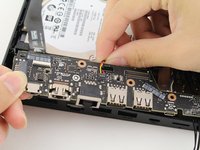
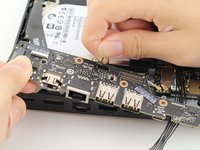
Remove the two pieces of adhesives found at the top and the bottom side of the hard drive.
-
-
-
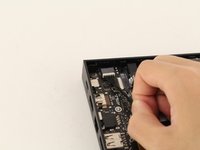
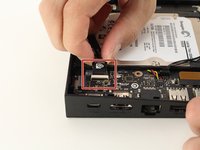
Next to the empty socket where the black wires were attached to the I/O board (refer back to Step 2), detach the plastic strap from the I/O board by pushing the strap away from the socket using your finger.
-
-
-
-
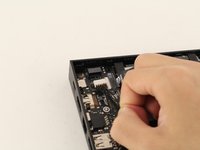
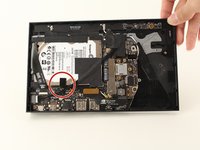
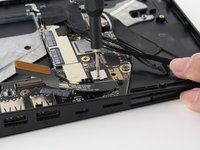
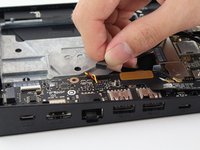
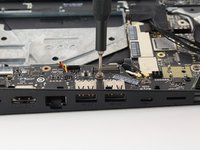
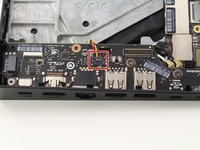
Remove the screw on the metal piece using a T6 Torx screwdriver and put away the metal piece after removing the screw.
-
-
-
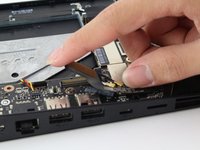
Detach the brown side of the connector from the I/O board by pulling it upward.
-
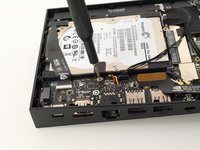
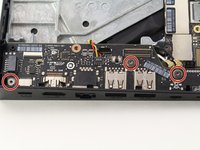
Remove the screw from the silver plate using a T6 Torx screwdriver.
-
Put the cable aside after removing it.
-
-
-
Detach the small bundle of black wires from the I/O board by gently pulling upward.
-
-
-
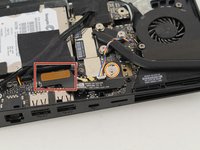
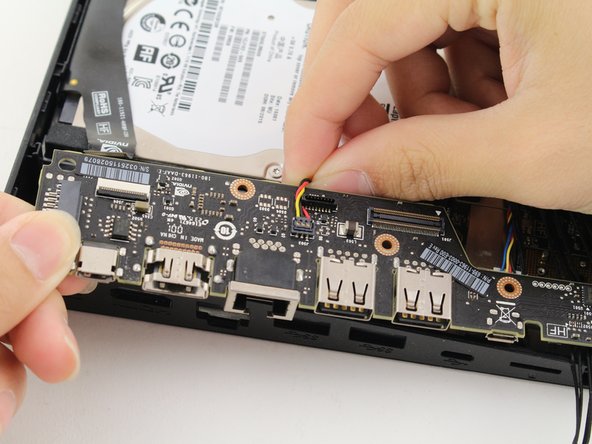
Detach the multi-colored (red/yellow/black) wire from the I/O board by pulling it away from the socket.
-
-
-
Gently remove the I/O board by sliding it away from the exterior input/output sockets on your Nvidia Shield Pro.
-


To reassemble your device, follow these instructions in reverse order.
다른 9명이 해당 안내서를 완성하였습니다.
팀

Cal Poly, Team S18-G2, White Winter 2020 Cal Poly, Team S18-G2, White Winter 2020 회원
CPSU-WHITE-W20S18G2
4 회원들
안내서 14개를 작성함