소개
When your speakers are dust-free and clean, but still aren’t outputting the sound quality you once had or know to expect from your Nvidia Shield Tablet, it is likely that they need replacing. Before you begin, it is important to determine which speaker is malfunctioning! Listen carefully to the speaker on the top of your Shield Tablet, and to the speaker on the bottom of your Shield Tablet so you know which one, or possibly both, need replacing. This replacement will require some internal exploration of your device, so follow our steps carefully to replace your broken speaker.
필요한 것
-
이 단계에 사용된 도구:Anti-Static Wrist Strap$7.95
-
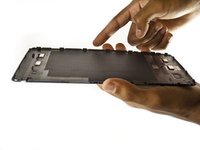
Set the tablet so the buttons, microSD, and stylus port are facing you.
-
Open the microSD slot.
-
Using the flat end of the spudger tool, carefully pry open the case starting from the microSD slot, slowly sliding the spudger along the inside edge of the case.
-
-
-
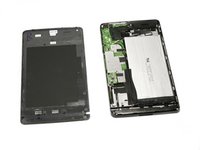
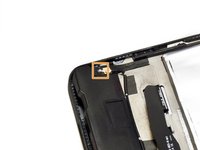
As you remove your case, be aware of small clips along the edges.
-
Finally, set the old casing aside.
-
-
-
-
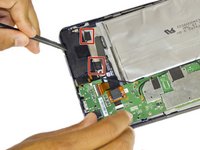
Orient your tablet so that the top of the tablet is furthest away from you.
-
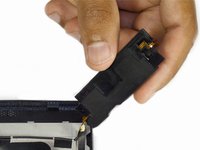
Locate the top speaker, a black semi-rectangular piece on the top right side of the tablet.
-
-
-
Gently pry the speaker up with the flat end of a spudger.
-
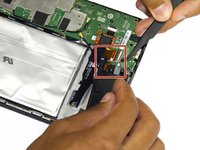
Use a plastic opening tool to peel up the tape covering the speaker wire.
-
-
이 단계에 사용된 도구:Anti-Static Wrist Strap$7.95
-
Next, with a gentle but firm grip, pull the audio input ribbon with the precision tweezers.
-
Finally, unplug the power source from your speaker using the precision tweezers.
-


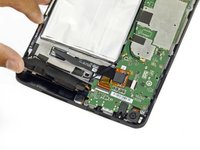


To reassemble your device, follow these instructions in reverse order.
다른 한 분이 해당 안내서를 완성하였습니다.
팀

USF Tampa, Team 2-2, Blackwell Fall 2015 USF Tampa, Team 2-2, Blackwell Fall 2015 회원
USFT-BLACKWELL-F15S2G2
3 회원들
안내서 11개를 작성함