소개
The PSP's buttons may become jammed or may not function properly. This guide will show how to access the buttons for repair, cleaning, or replacement.
필요한 것
-
-
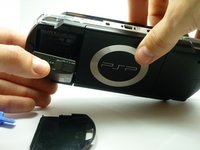
Locate the battery casing button on the rear-left side of the PSP.
-
Press down the button and remove the battery cover.
-
-
-
-
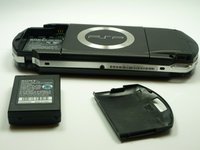
Remove the screw from the bottom side of the PSP. Keep it separated from the rest of the screws.
-
Remove the two screws from the back righthand side within the holes.
-
-
-
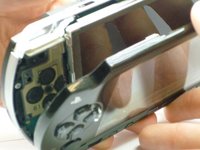
Gently separate the outer plastic casing from the rest of the system as shown.
-
-
-
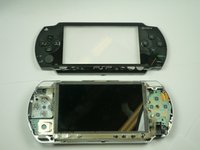
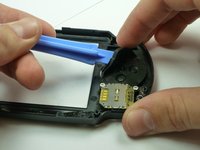
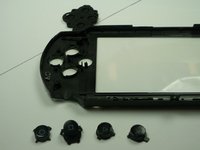
If the Arrow Buttons are not functioning properly, flip over the outer casing and locate the inside of the buttons, as shown
-
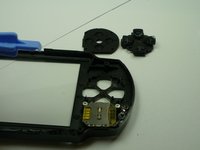
Carefully remove the black rubber backing off of the buttons.
-
Clean the inside of the rubber and the outside of the buttons with a cloth.
-
-
-
If needed, replace the old buttons with a new set (which can be purchased from Sony or other electronics stores).
-
Gently re-apply the back rubber to the back of the buttons.
-
-
-
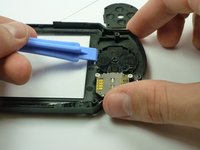
If function buttons (x, square, circle, triangle) need to be replaced, find the corresponding black rubber backing on the inside of the casing.
-
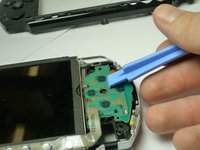
Carefully remove the back rubber to expose the rear side of the buttons as shown. (This can be done using your hands.)
-
-
-
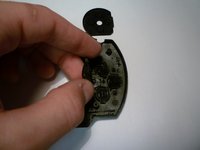
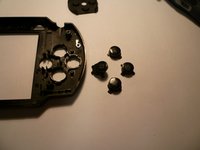
If the buttons are clearly damaged, then they need to be replaced.
-
Add the new ones in the form, with the correct button order. (The correct button order has the Triangle on the top, Square on the right, Circle on the left, and X on the bottom).
-
-
-
Once buttons are correctly replaced, the back rubbers are fit back onto the buttons, refer back to Replacing the Housing to reattach the casing.
-


To reassemble your device, follow these instructions in reverse order.
다른 36명이 해당 안내서를 완성하였습니다.

팀

Cal Poly, Team 5-6, Forte Winter 2010 Cal Poly, Team 5-6, Forte Winter 2010 회원
CPSU-FORTE-W10S5G6
5 회원들
안내서 34개를 작성함
13가이드 댓글
Great guide. I highly Recomend this to anyone that needs to replace their PSP buttons
unashamed45 - 답글 공유
Otimo guia recomendo.
use magnetised screwdriver i had a normal one and it was a pain in the ass to put those tiny little bastards back
Nagy Dániel - 답글 공유
Thank you this was a great guide