주요 콘텐츠로 건너뛰기
수리 커뮤니티 가입 - 계정 만들기

Palm Treo 600 Screen Replacement

필요한 것

  1. Palm Treo 600 Screen Replacement, Back Case: 1 단계, 이미지 1개 중 1개
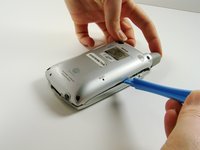
    • On the back of the device, locate the 3 rubber plugs, and use a plastic spudger to remove them.

    댓글 쓰기

  2. Palm Treo 600 Screen Replacement: 2 단계, 이미지 2개 중 1개 Palm Treo 600 Screen Replacement: 2 단계, 이미지 2개 중 2개
    • Use the T6 Torx Screwdriver to remove all 4 screws.

    • You have to first remove the Stylus to access the 4th screw.

    댓글 쓰기

  3. Palm Treo 600 Screen Replacement: 3 단계, 이미지 2개 중 1개 Palm Treo 600 Screen Replacement: 3 단계, 이미지 2개 중 2개
    • Using a plastic opening tool, carefully separate the front and back cases.

    • Note: The antenna will detach from the phone.

    댓글 쓰기

  4. Palm Treo 600 Screen Replacement, Front Case: 4 단계, 이미지 2개 중 1개 Palm Treo 600 Screen Replacement, Front Case: 4 단계, 이미지 2개 중 2개
    • Using a T6 Torx Screwdriver, remove the two screws.

    • The motherboard will now be loose from the front case.

    댓글 쓰기

  5. Palm Treo 600 Screen Replacement, Screen: 5 단계, 이미지 1개 중 1개
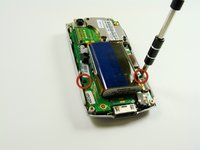
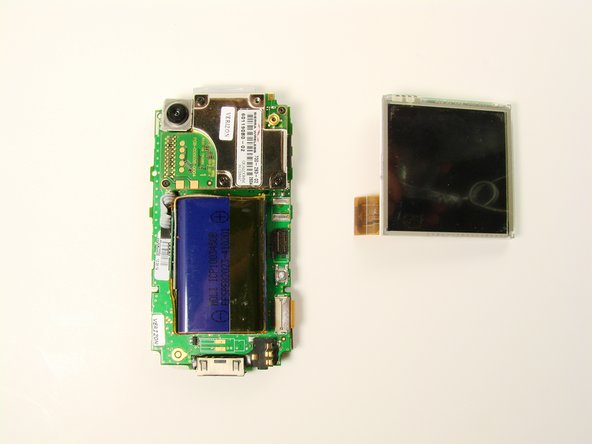
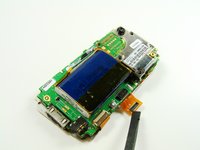
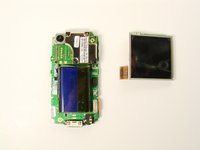
    • The screen is connected to the phone with an orange data cable.

    • Slide the spudger as close to the connection as possible.

    • Gently pull the spudger up and the cable should come out of the socket.

    댓글 쓰기

  6. Palm Treo 600 Screen Replacement: 6 단계, 이미지 2개 중 1개 Palm Treo 600 Screen Replacement: 6 단계, 이미지 2개 중 2개
    • Once the cable is unplugged, you can remove the screen from the body.

    댓글 쓰기

결론

To reassemble your device, follow these instructions in reverse order.

취소: 해당 안내서를 완성하지 않았습니다.

작성자

5다른 기여자 명과 함께

Clement Poisson

회원 가입일: 01/26/10

24 평판

안내서 7개를 작성함

Cal Poly, Team 13-23, Maness Winter 2010 Cal Poly, Team 13-23, Maness Winter 2010 회원

CPSU-MANESS-W10S13G23

4 회원들

안내서 16개를 작성함

0가이드 댓글

댓글 쓰기

조회 통계:

지난 24시간: 0

지난 7일: 5

지난 30일: 34

전체 시간: 2,478