소개
This guide shows you how to take off the back panel to the Palm Treo 680 in order to reach the other components within side the phone.
필요한 것
-
-
Remove the battery cover by pressing on the small rectangular button located on the back of the phone.
 FixBot에 문의하기
-
-
-
-
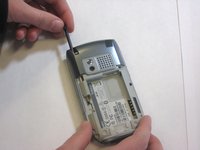
Remove the stylus in order to access the screw.
-
Remove the 27mm top-left screw using a T6 Torx screwdriver.
-
-
-
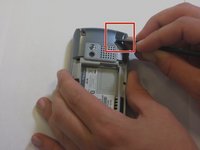
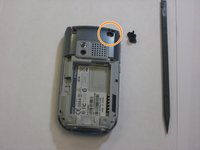
Using the spudger, remove the rubber rectangular cover located in the upper rear, right-hand corner.
-
Remove the 27mm screw using the T6 Torx screwdriver.
-
-
-
Remove the remaining two 27mm screws from the bottom using the T6 screwdriver.
-
-
-
Turn the phone so the screen is facing the right side.
-
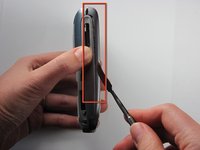
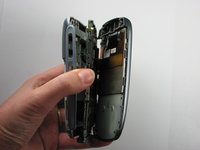
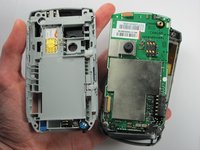
Use a spudger to carefully separate the back panel from the front panel to access components inside the phone.
-
Separate the covers from the left side of the device as indicated in the picture.
-


To reassemble your device, follow these instructions in reverse order.
다른 2명이 해당 안내서를 완성하였습니다.
팀

Cal Poly, Team 6-4, Maness Fall 2009 Cal Poly, Team 6-4, Maness Fall 2009 회원
CPSU-MANESS-F09S6G4
4 회원들
안내서 27개를 작성함