소개
Before you begin disassembly, be sure to have the necessary tools. You will need a Torx size T6 screwdriver, tweezers, and the device opening tool. You will remove the stylus and back plate in order to access the battery.
필요한 것
-
-
Remove the 4 screws from the corners of the back panel of the device using a size T6 Torx screwdriver.
-
-
-
-
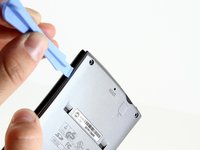
Insert the edge of the plastic opening tool between the back panel and the black stylus holder.
-
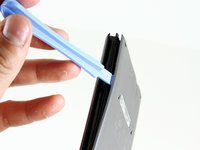
Carefully and forcefully pry the panels apart.
-
-
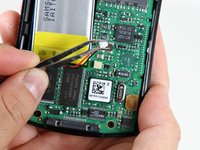
이 단계에 사용된 도구:Tweezers$4.99
-
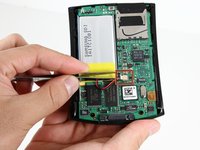
Use tweezers to unplug the battery cable from the motherboard socket.
-
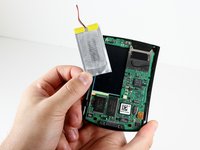
Gently remove the battery from the motherboard using your thumb and forefinger to pull upwards.
-


To reassemble your device, follow these instructions in reverse order.
다른 6명이 해당 안내서를 완성하였습니다.
팀

Cal Poly, Team 14-9, Forte Winter 2011 Cal Poly, Team 14-9, Forte Winter 2011 회원
CPSU-FORTE-W11S14G9
6 회원들
안내서 6개를 작성함