주요 콘텐츠로 건너뛰기
수리 커뮤니티 가입 - 계정 만들기

Panasonic Lumix DMC-FX01 Camera Lens Replacement

필요한 것

    1. Panasonic Lumix DMC-FX01 Camera Lens Replacement, Battery: 1 단계, 이미지 1개 중 1개
      • Locate the memory card and battery card latch on the bottom of the camera.

      • Slide the latch to the open position.

      댓글 쓰기

    2. Panasonic Lumix DMC-FX01 Camera Lens Replacement: 2 단계, 이미지 1개 중 1개
      • Open the battery latch, and slide the battery release lever to the right.

      댓글 쓰기

    3. Panasonic Lumix DMC-FX01 Camera Lens Replacement: 3 단계, 이미지 1개 중 1개
      • Remove the battery from the camera.

      댓글 쓰기

    1. Panasonic Lumix DMC-FX01 Camera Lens Replacement, Rear Casing: 4 단계, 이미지 1개 중 1개
      • Remove the three 4.6 mm screws on the bottom of the camera using a Phillips #00 screwdriver.

      댓글 쓰기

    2. Panasonic Lumix DMC-FX01 Camera Lens Replacement: 5 단계, 이미지 1개 중 1개
      • Remove the single 3.2 mm screw on the left side of the camera using a Phillips #00 screwdriver.

      댓글 쓰기

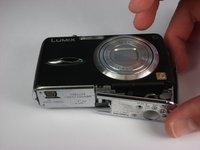
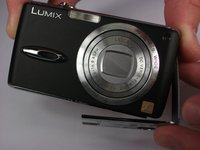
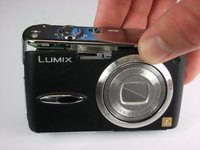
    3. Panasonic Lumix DMC-FX01 Camera Lens Replacement: 6 단계, 이미지 2개 중 1개 Panasonic Lumix DMC-FX01 Camera Lens Replacement: 6 단계, 이미지 2개 중 2개
      • Remove the left side casing.

      댓글 쓰기

    4. Panasonic Lumix DMC-FX01 Camera Lens Replacement: 7 단계, 이미지 1개 중 1개
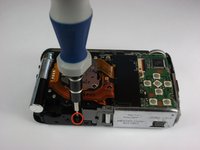
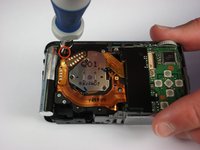
      • Remove the two 3.2 mm screws on the right side of the camera using a Phillips #00 screwdriver.

      댓글 쓰기

    5. Panasonic Lumix DMC-FX01 Camera Lens Replacement: 8 단계, 이미지 1개 중 1개
      • Remove the bottom right panel.

      댓글 쓰기

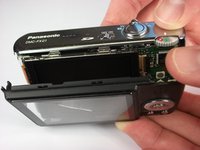
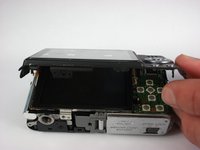
    6. Panasonic Lumix DMC-FX01 Camera Lens Replacement: 9 단계, 이미지 2개 중 1개 Panasonic Lumix DMC-FX01 Camera Lens Replacement: 9 단계, 이미지 2개 중 2개
      • Gently remove the back casing.

      • Start at the bottom and carefully pry towards the top to get this piece free.

      댓글 쓰기

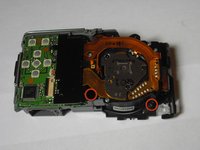
    1. Panasonic Lumix DMC-FX01 Camera Lens Replacement, Front Casing: 10 단계, 이미지 2개 중 1개 Panasonic Lumix DMC-FX01 Camera Lens Replacement, Front Casing: 10 단계, 이미지 2개 중 2개
      • Remove the two black 5.4 mm screws that hold in the front faceplate using a Phillips #00 screwdriver.

      • There may be a third screw the the right of the lens assembly.

      댓글 쓰기

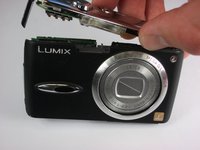
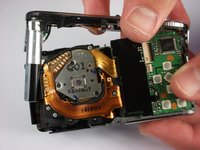
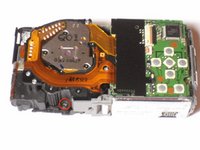
    2. Panasonic Lumix DMC-FX01 Camera Lens Replacement: 11 단계, 이미지 3개 중 1개 Panasonic Lumix DMC-FX01 Camera Lens Replacement: 11 단계, 이미지 3개 중 2개 Panasonic Lumix DMC-FX01 Camera Lens Replacement: 11 단계, 이미지 3개 중 3개
      • Carefully remove the upper assembly, which houses the buttons and the flash battery.

      댓글 쓰기

    3. Panasonic Lumix DMC-FX01 Camera Lens Replacement: 12 단계, 이미지 1개 중 1개
      • Carefully remove the front casing after verifying that the thin plastic around the lens is not still attached.

      댓글 쓰기

    1. Panasonic Lumix DMC-FX01 Camera Lens Replacement, Lens Assembly: 13 단계, 이미지 2개 중 1개 Panasonic Lumix DMC-FX01 Camera Lens Replacement, Lens Assembly: 13 단계, 이미지 2개 중 2개
      • Remove the three black 5mm screws attached to the lens frame.

      댓글 쓰기

    2. Panasonic Lumix DMC-FX01 Camera Lens Replacement: 14 단계, 이미지 1개 중 1개
      • Remove the lens frame.

      댓글 쓰기

    3. Panasonic Lumix DMC-FX01 Camera Lens Replacement: 15 단계, 이미지 1개 중 1개
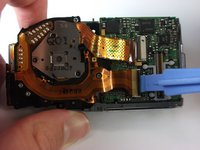
      • Lift out the circuit board as shown.

      댓글 쓰기

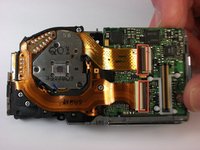
    4. Panasonic Lumix DMC-FX01 Camera Lens Replacement: 16 단계, 이미지 2개 중 1개 Panasonic Lumix DMC-FX01 Camera Lens Replacement: 16 단계, 이미지 2개 중 2개
      • Lift the two black latches that hold the connector ribbons in place.

      • Disconnect the two ribbons.

      댓글 쓰기

    5. Panasonic Lumix DMC-FX01 Camera Lens Replacement: 17 단계, 이미지 1개 중 1개
      • Remove the lens assembly as shown.

      댓글 쓰기

    1. Panasonic Lumix DMC-FX01 Camera Lens Replacement, Camera Lens: 18 단계, 이미지 1개 중 1개
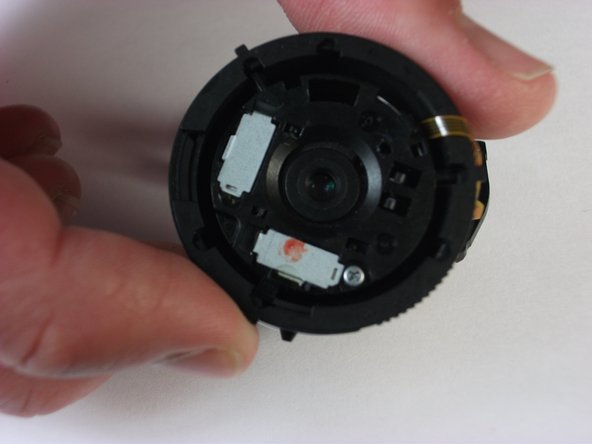
      • Remove four 4 mm screws from the lens assembly using the Phillips #00 screwdriver.

      댓글 쓰기

    2. Panasonic Lumix DMC-FX01 Camera Lens Replacement: 19 단계, 이미지 2개 중 1개 Panasonic Lumix DMC-FX01 Camera Lens Replacement: 19 단계, 이미지 2개 중 2개
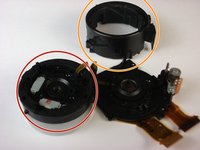
      • Separate the fixed frame unit from the main lens assembly.

      • Separate the direct frame unit from the main lens assembly.

      댓글 쓰기

    3. Panasonic Lumix DMC-FX01 Camera Lens Replacement: 20 단계, 이미지 1개 중 1개
      • Remove the first lens frame from the lens assembly.

      댓글 쓰기

    4. Panasonic Lumix DMC-FX01 Camera Lens Replacement: 21 단계, 이미지 1개 중 1개
      • Detach the second frame unit from the lens assembly.

      댓글 쓰기

    5. Panasonic Lumix DMC-FX01 Camera Lens Replacement: 22 단계, 이미지 1개 중 1개
      • Remove the 4m m screw from the lens housing using the Phillips #00 screwdriver.

      댓글 쓰기

    6. Panasonic Lumix DMC-FX01 Camera Lens Replacement: 23 단계, 이미지 1개 중 1개
      • Separate the lens housing.

      • Replace the lens by gently prying away from the assembly.

      댓글 쓰기

결론

To reassemble your device, follow these instructions in reverse order.

취소: 해당 안내서를 완성하지 않았습니다.

다른 4명이 해당 안내서를 완성하였습니다.

작성자

9다른 기여자 명과 함께

Caleb Fink

회원 가입일: 10/11/10

191 평판

안내서 2개를 작성함

Cal Poly, Team 9-22, Regan Fall 2010 Cal Poly, Team 9-22, Regan Fall 2010 회원

CPSU-REGAN-F10S9G22

4 회원들

안내서 16개를 작성함

0가이드 댓글

댓글 쓰기

조회 통계:

지난 24시간: 3

지난 7일: 13

지난 30일: 44

전체 시간: 13,670