소개
Buttons on your portable DVD player can become damaged and no longer able to respond, this guide will direct you on how to replace the button panel. You will be able to complete this task with a minimum amount of time and tools required.
필요한 것
-
-
Lay the player flat so the outside casing is facing upwards. Using the screwdriver, unscrew all the case screws on the bottom of the player.
 FixBot에 문의하기
-
-
-
Open the disc flap and unscrew the screws inside. There will be three screws.
-
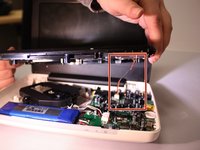
Using spudger, pry open the disk casing, and pull upwards removing it from the outer casing.
-
-
-
-
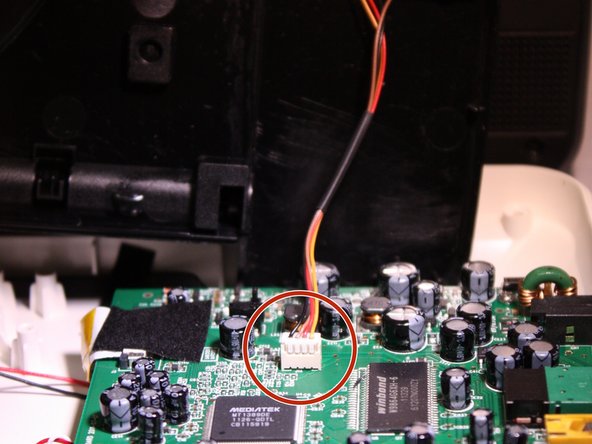
After casing has been detached, there will be a wire connecting the button panel on the disk flap case to the motherboard.
-
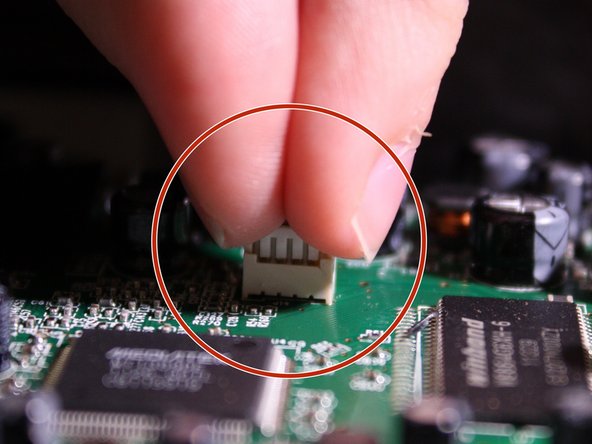
To detach this wire, use your fingers and tightly pinch the plastic connector, and gently pull upwards disconnecting it from the motherboard.
-
-
-
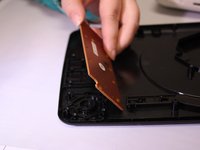
On the bottom side of the disk flap case, the back of the button panel will be visible. Using a Philips J0 screwdriver, unscrew all 6 screws.
-
-
-
Once unscrewed. gently pull upwards detaching the button panel from the casing.
-


To reassemble your device, follow these instructions in reverse order.

팀

Eastern Washington University, Team 1-3, Matresse Fall 2015 Eastern Washington University, Team 1-3, Matresse Fall 2015 회원
EWU-MATRESSE-F15S1G3
3 회원들
안내서 4개를 작성함