소개
The plum Optimax user manual recommends not removing the battery but it is possible if necessary. Be sure to be cautious when using the tools to avoid damaging internal components or puncturing the battery.
필요한 것
-
-
-
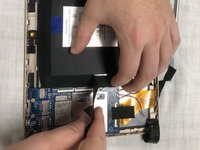
Use a metal spudger to remove the small panels to the immediate left and right side of the camera.
 FixBot에 문의하기
-
-
-
Use a metal spudger to begin lifting the back cover.
-
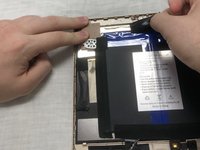
Then, create leverage and gently remove the entire cover.
-
-
-
-
-
-
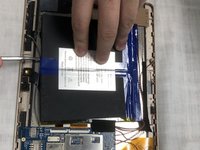
Remove electrical tape placed around the battery to keep it in place.
-
-
-
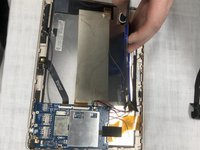
Use the spudger as a wedge underneath the battery to assist in removal.
-
Once loosened with the spudger, the battery is now removed from the device.
-
-


To reassemble your device, follow these instructions in reverse order.

팀

IUPUI, Team S1-G4, Hovde Fall 2018 IUPUI, Team S1-G4, Hovde Fall 2018 회원
IUPUI-HOVDE-F18S1G4
3 회원들
안내서 6개를 작성함