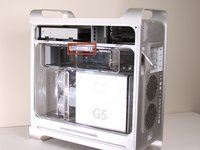
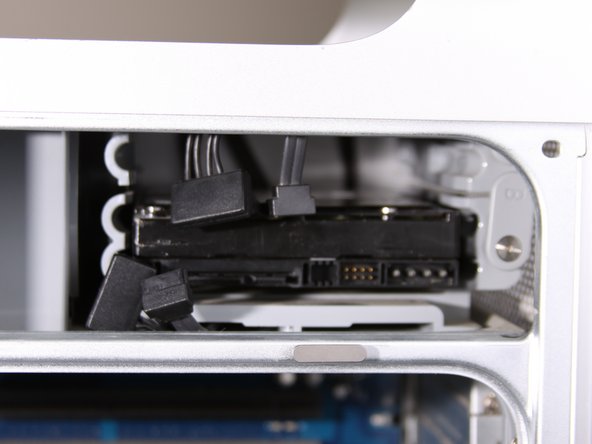
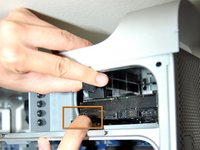
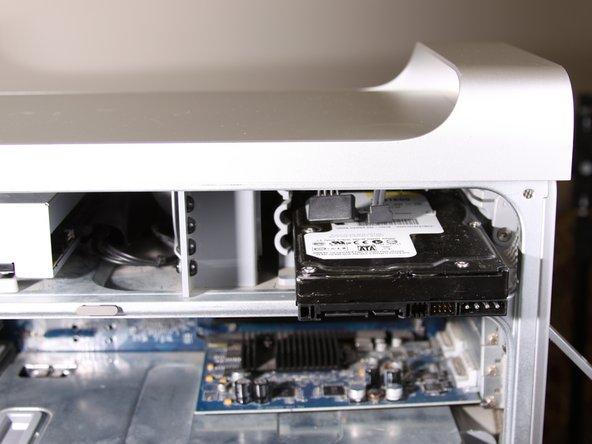
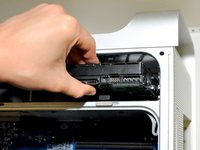
주요 콘텐츠로 건너뛰기

Power Mac G5 Hard Drive Replacement

필요한 것

  1. Power Mac G5 Hard Drive Replacement, Side Panel: 1 단계, 이미지 1/1
    • To avoid electrocution, shut down the computer. Do not open the computer or attempt to install any items inside it while the computer is on.

    • To avoid being burned, wait at least 10 minutes to allow the computer's internal components to cool.

  2. Power Mac G5 Hard Drive Replacement: 2 단계, 이미지 1/1
    • Remove all the cables, including the power cables before opening the unit.

  3. Power Mac G5 Hard Drive Replacement: 3 단계, 이미지 1/2 Power Mac G5 Hard Drive Replacement: 3 단계, 이미지 2/2
    • Lift the tab to unlock the side panel.

    • The panel should fall out. If the panel does not fall out by itself pull a little from the edges.

  4. Power Mac G5 Hard Drive Replacement: 4 단계, 이미지 1/3 Power Mac G5 Hard Drive Replacement: 4 단계, 이미지 2/3 Power Mac G5 Hard Drive Replacement: 4 단계, 이미지 3/3
    • Remove the air deflector (the clear plastic cover) by pulling on the handle.

  5. Power Mac G5 Hard Drive Replacement, Hard Drive: 5 단계, 이미지 1/1
    • Locate hard drive on the top right-hand corner of the desktop.

  6. Power Mac G5 Hard Drive Replacement: 6 단계, 이미지 1/2 Power Mac G5 Hard Drive Replacement: 6 단계, 이미지 2/2
    • Rotate up plastic tab labeled "B" on the right hand side of hard drive.

  7. Power Mac G5 Hard Drive Replacement: 7 단계, 이미지 1/2 Power Mac G5 Hard Drive Replacement: 7 단계, 이미지 2/2
    • Detach both cables from the hard drive.

  8. Power Mac G5 Hard Drive Replacement: 8 단계, 이미지 1/2 Power Mac G5 Hard Drive Replacement: 8 단계, 이미지 2/2
    • Pull out the hard drive out.

  9. Power Mac G5 Hard Drive Replacement: 9 단계, 이미지 1/1
    • After hard drive is out, the space should look like this.

결론

To reassemble your device, follow these instructions in reverse order.

다른 101명이 해당 안내서를 완성하였습니다.

Jessica Chaidez

회원 가입일: 01/13/10

7,956 평판

안내서 3개 작성하였습니다

Cal Poly, Team 5-8, Forte Winter 2010 Cal Poly, Team 5-8, Forte Winter 2010 회원

CPSU-FORTE-W10S5G8

7 회원들

안내서 20개 작성하였습니다

댓글 8개

I don't see why you'd need to remove the plastic cover

Petteri - 답글

I've tried many times to remove this and my other misplaced comment duplicate, but here they'll stay apparently... you're free to delete them if you can.

Petteri -

REMOVE the plastic cover to avoid knocking it off in the process of working on the drive bays. (Just a precaution - kind of like not setting a glass of red wine on an elegant white table cloth.)

EyeSpye -

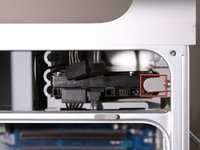
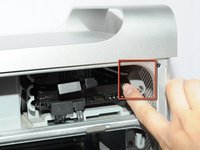
The Comments appended to these instructions are VERY helpful. If you read them you will save time, and avoid some of the mistakes I made - particularly with respect to the Drive mounting screws located to the left side of the drive installation bays, and the need to remove the bottom drive FIRST if you wish to access the top drive. THANKS for a great set of instructions.

EyeSpye - 답글

This was helpful! Excellent photographs and clear, simple instructions. Thanks, Jessica and iFixit!

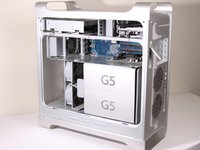
I used these instructions to remove an additional hard drive while leaving the original hard drive in place. I did not know which one to remove, as the hard drives do not have side labels, so I guessed: the original drive was on top, the additional drive on the bottom. It might be helpful for other viewers to know what to do in a similar situation.

Cheers.

Sharine Borslien - 답글

댓글 쓰기

조회 통계:

24 시간 전: 5

7일 전: 36

30일 전: 147

전체 시간: 83,619