주요 콘텐츠로 건너뛰기

ProScan PLT7050 Battery Replacement

필요한 것

  1. ProScan PLT7050 Battery Replacement, Open Device: 1 단계, 이미지 1/1
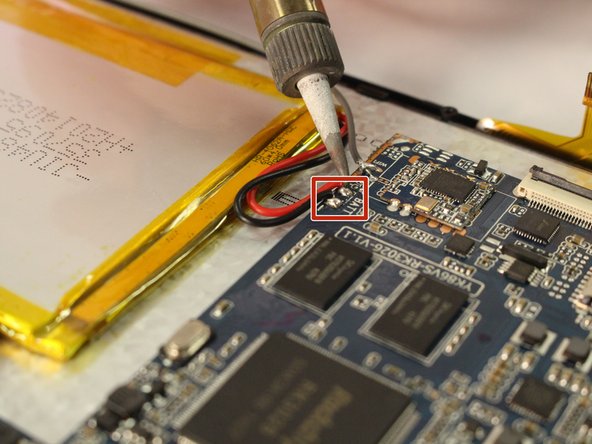
    • Make sure device is unplugged and turned off while working on the device.

    • Remove 2 Phillips head, 4.3 mm screws from the bottom side of the tablet with a PH00 screwdriver.

  2. ProScan PLT7050 Battery Replacement: 2 단계, 이미지 1/1
    • Use the plastic opening tools to pry the back of the tablet open.

    • You may need to slide the tool along the sides of the device to get it to open. You might hear some popping noises, it is okay.

    • May be helpful if you start by the microSD slot.

  3. ProScan PLT7050 Battery Replacement, Battery: 3 단계, 이미지 1/2 ProScan PLT7050 Battery Replacement, Battery: 3 단계, 이미지 2/2
    • Use the soldering tool to remove the wires from the motherboard. (Black and Red)

    • The soldering tool is hot.

    • Take note of where the wires are located.

  4. ProScan PLT7050 Battery Replacement: 4 단계, 이미지 1/2 ProScan PLT7050 Battery Replacement: 4 단계, 이미지 2/2
    • Remove the black tape from the battery.

    • Remove the three pieces of yellow tape from the battery.

  5. ProScan PLT7050 Battery Replacement: 5 단계, 이미지 1/1
    • Use the plastic opening tool to pry the battery from the device as it is attached by an adhesive.

    • Do not proceed if corrosion and/or swelling of the battery is visible.

결론

To reassemble your device, follow these instructions in reverse order.

다른 4명이 해당 안내서를 완성하였습니다.

Jazmine Jackson

회원 가입일: 01/19/17

284 평판

안내서 2개 작성하였습니다

댓글 0개

댓글 쓰기

조회 통계:

24 시간 전: 0

7일 전: 3

30일 전: 7

전체 시간: 961