주요 콘텐츠로 건너뛰기

Propeller Replacement

필요한 것

  1. Propeller Replacement, Propeller: 1 단계, 이미지 2개 중 1개 Propeller Replacement, Propeller: 1 단계, 이미지 2개 중 2개
    • Rotate the propeller to locate the propeller set screw.

  2. Propeller Replacement: 2 단계, 이미지 2개 중 1개 Propeller Replacement: 2 단계, 이미지 2개 중 2개
    • Unscrew the single 4 mm Phillips screw.

  3. Propeller Replacement: 3 단계, 이미지 3개 중 1개 Propeller Replacement: 3 단계, 이미지 3개 중 2개 Propeller Replacement: 3 단계, 이미지 3개 중 3개
    • Slide the propeller up and off the motor assembly.

  4. Propeller Replacement: 4 단계, 이미지 3개 중 1개 Propeller Replacement: 4 단계, 이미지 3개 중 2개 Propeller Replacement: 4 단계, 이미지 3개 중 3개
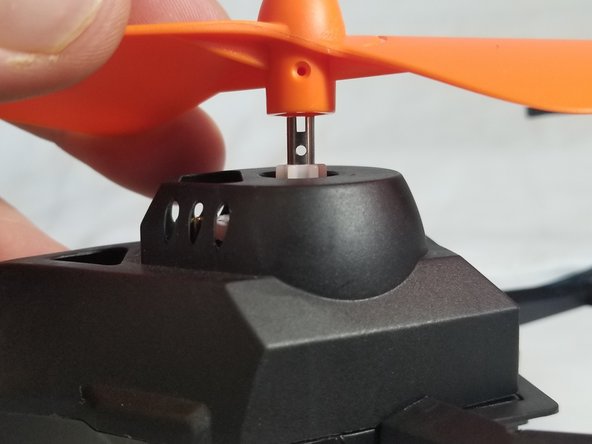
    • To attach the new propeller, align the hexagonal slot in the propeller base with the keyed motor shaft.

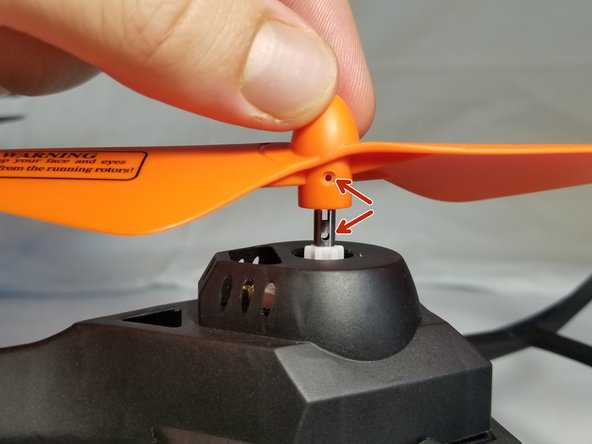
    • Ensure one of the screw holes on the motor shaft aligns with the propeller screw hole.

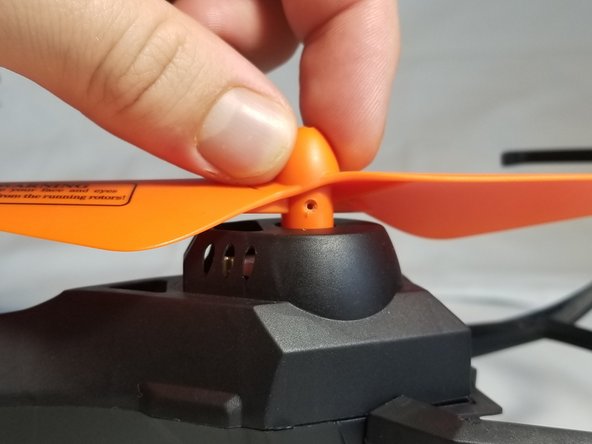
    • Slide the propeller onto the motor shaft.

  5. Propeller Replacement: 5 단계, 이미지 2개 중 1개 Propeller Replacement: 5 단계, 이미지 2개 중 2개
    • Finally, fasten the set screw back into the propeller.

    • Congratulations, you have completed this propeller replacement guide! If your drone continues to malfunction, try exploring the motor replacement guide here

결승점

작성자

2다른 기여자 명과 함께

Adrian Eaton

회원 가입일: 01/12/15

617 평판

안내서 4개를 작성함

Cal Poly, Team 70-2, Forte Winter 2015 Cal Poly, Team 70-2, Forte Winter 2015 회원

CPSU-FORTE-W15S70G2

4 회원들

안내서 10개를 작성함

0가이드 댓글

댓글 쓰기

조회 통계:

지난 24시간: 0

지난 7일: 0

지난 30일: 3

전체 시간: 259