주요 콘텐츠로 건너뛰기

Protocol Dronium III AP Camera Replacement

필요한 것

  1. Protocol Dronium III AP Camera Replacement, Drone Battery Pack: 1 단계, 이미지 2개 중 1개 Protocol Dronium III AP Camera Replacement, Drone Battery Pack: 1 단계, 이미지 2개 중 2개
    • Ensure the drone is powered off.

    • Press in and lift battery compartment cover.

    • A soft pry tool may be used for easier access.

  2. Protocol Dronium III AP Camera Replacement: 2 단계, 이미지 1개 중 1개
    • Remove battery pack from body of drone.

  3. Protocol Dronium III AP Camera Replacement: 3 단계, 이미지 2개 중 1개 Protocol Dronium III AP Camera Replacement: 3 단계, 이미지 2개 중 2개
    • Disconnect white connectors between the battery pack and drone.

  4. Protocol Dronium III AP Camera Replacement, Camera: 4 단계, 이미지 1개 중 1개
    • Remove the eight (8) 5mm screws attaching the motor arms to the body using a JIS #00 screwdriver.

  5. Protocol Dronium III AP Camera Replacement: 5 단계, 이미지 2개 중 1개 Protocol Dronium III AP Camera Replacement: 5 단계, 이미지 2개 중 2개
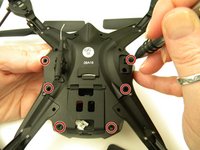
    • Remove the six (6) 5mm screws attaching the Body Cover to the Body of the drone using a JIS #00 screwdriver.

    • Remove the Body Cover.

  6. Protocol Dronium III AP Camera Replacement: 6 단계, 이미지 2개 중 1개 Protocol Dronium III AP Camera Replacement: 6 단계, 이미지 2개 중 2개
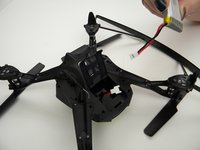
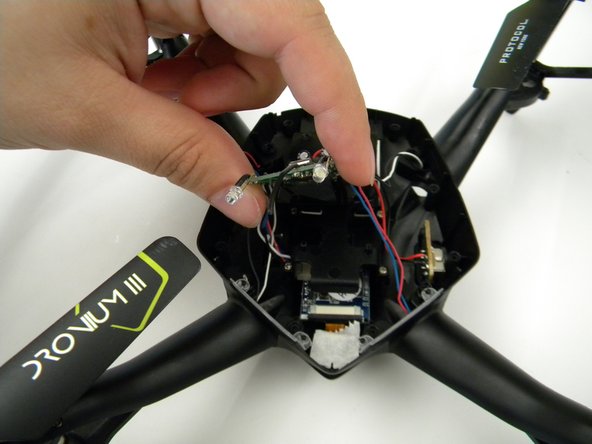
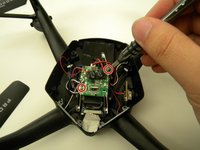
    • Remove the two (2) 5mm screws attaching the Motherboard to the body of the drone using a JIS #00 screwdriver.

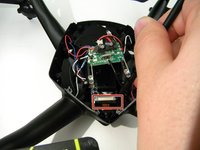
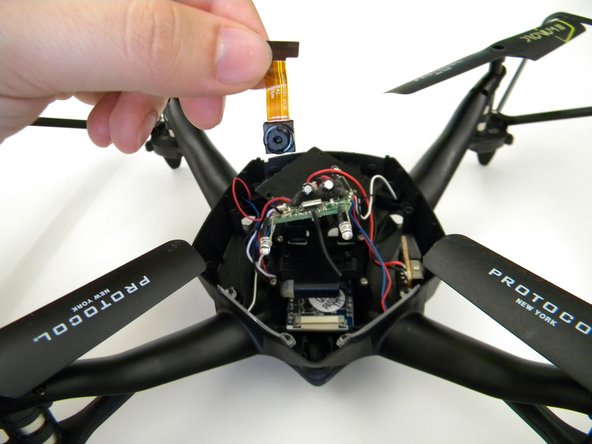
    • Lift the Motherboard off the mounting position.
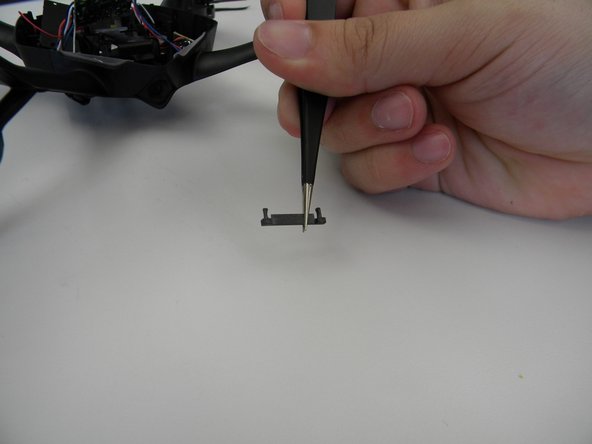
    • Do not pull hard on the Motherboard as solder connections are fragile.

  7. Protocol Dronium III AP Camera Replacement: 7 단계, 이미지 1개 중 1개
    이 단계에 사용된 도구:
    Tweezers
    $4.99
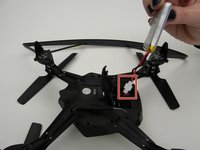
    • Remove the tape covering the camera with the tweezers.

  8. Protocol Dronium III AP Camera Replacement: 8 단계, 이미지 2개 중 1개 Protocol Dronium III AP Camera Replacement: 8 단계, 이미지 2개 중 2개
    • Remove the plastic holding the ribbon cable connector with the tweezers.

    • Be careful with the ribbon cable, it is easy to damage.

  9. Protocol Dronium III AP Camera Replacement: 9 단계, 이미지 1개 중 1개
    • Move the ribbon cable out of the way with the Spuger.

  10. Protocol Dronium III AP Camera Replacement: 10 단계, 이미지 2개 중 1개 Protocol Dronium III AP Camera Replacement: 10 단계, 이미지 2개 중 2개
    • Remove the camera by gently prying it out of the bracket with the spudger.

결론

To reassemble your device, follow these instructions in reverse order.

작성자

5다른 기여자 명과 함께

Steven Mooers

회원 가입일: 10/18/17

401 평판

안내서 4개를 작성함

UW Tacoma, Team S1-G1, Rose Fall 2017 UW Tacoma, Team S1-G1, Rose Fall 2017 회원

UWT-ROSE-F17S1G1

4 회원들

안내서 4개를 작성함

0가이드 댓글

댓글 쓰기

조회 통계:

지난 24시간: 0

지난 7일: 2

지난 30일: 3

전체 시간: 371