주요 콘텐츠로 건너뛰기
수리 커뮤니티 가입 - 계정 만들기

Prototyping a Board

    1. Prototyping a Board, Board layout using EAGLE: 1 단계, 이미지 3개 중 1개 Prototyping a Board, Board layout using EAGLE: 1 단계, 이미지 3개 중 2개 Prototyping a Board, Board layout using EAGLE: 1 단계, 이미지 3개 중 3개
      • Create the board layout using EAGLE FREE on more information on this step.

      • A video tutorial for using EAGLE for a board layout can be found here.

      • Remove all the labels and export it as a monochrome image (.png).

      댓글 쓰기

    2. Prototyping a Board, Convert to .rml file: 2 단계, 이미지 2개 중 1개 Prototyping a Board, Convert to .rml file: 2 단계, 이미지 2개 중 2개
      • Upload the image to fabmodules.org.

      • Output format for "Roland mill (.rml)".

      • The process box is how thick you want the cuts. Select "PCP traces (1/64)".

      댓글 쓰기

    3. Prototyping a Board, Setting up the output: 3 단계, 이미지 2개 중 1개 Prototyping a Board, Setting up the output: 3 단계, 이미지 2개 중 2개
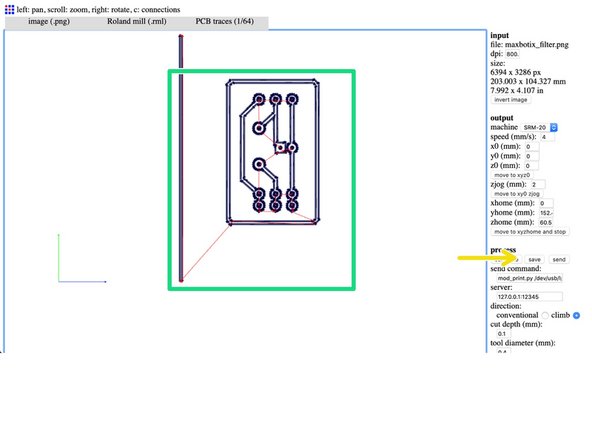
      • From the output menu, select the following: Machine: SRM-20, X0: 0, Y0: 0, X0: 0. Leave the rest as default.

      • Then select the "calculate" button.

      • Next select the "save" button.

      • The image shows the cut cut patterns. (The red lines are where the machine is picked up and moved to the next spot to cut.)

      • Repeat steps 2 and 3 but with the minor change of selecting "PCB outlines (1/32)" in the "process" option.

      댓글 쓰기

    4. Prototyping a Board, Starting the Roland SRM-20: 4 단계, 이미지 2개 중 1개 Prototyping a Board, Starting the Roland SRM-20: 4 단계, 이미지 2개 중 2개
      • Push the green button to turn on the Roland SRM-20 and plug the machine's USB into computer. Note: it must be a windows computer.

      • Open the program VPanel for SRM-20. You can download the program and manual here.

      • Hit the "on" button to run the machine for a minute to allow it to warm up.

      댓글 쓰기

    5. Prototyping a Board, Adding file to VPanel: 5 단계, 이미지 3개 중 1개 Prototyping a Board, Adding file to VPanel: 5 단계, 이미지 3개 중 2개 Prototyping a Board, Adding file to VPanel: 5 단계, 이미지 3개 중 3개
      • Select the "cut" button which will bring up a new window.

      • Click the "add" button to add a file.

      • Add the file and click "open".

      • Then select the "output" button.

      댓글 쓰기

    6. Prototyping a Board, Setting up the Roland SRM-20: 6 단계, 이미지 3개 중 1개 Prototyping a Board, Setting up the Roland SRM-20: 6 단계, 이미지 3개 중 2개 Prototyping a Board, Setting up the Roland SRM-20: 6 단계, 이미지 3개 중 3개
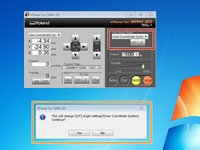
      • Set the bit and the material. And set the "home" for xy and for z. See the manual for these instructions.

      • Note: you will see this dialog box when you set the "home". Select "yes".

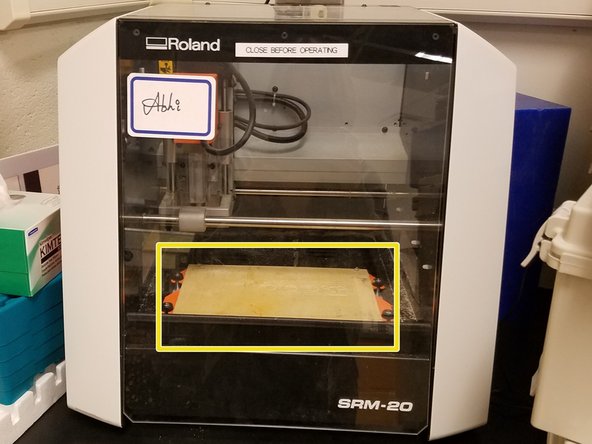
      • Note: there is a sacrificial board on top to protect the machine.

      • Once everything is ready, select the "output" button. This will begin cutting process.

      • Click here for a more detailed tutorial from an outside site.

      댓글 쓰기

결승점

취소: 해당 안내서를 완성하지 않았습니다.

다른 한 분이 해당 안내서를 완성하였습니다.

작성자

2다른 기여자 명과 함께

Brooke Mason

회원 가입일: 05/29/19

2,958 평판

안내서 17개를 작성함

Open-Storm Open-Storm 회원

Community

14 회원들

안내서 75개를 작성함

0가이드 댓글

댓글 쓰기

조회 통계:

지난 24시간: 0

지난 7일: 5

지난 30일: 25

전체 시간: 400