주요 콘텐츠로 건너뛰기
수리 커뮤니티 가입 - 계정 만들기

Removing Olympus FE-210 Rear Casing

필요한 것

  1. Removing Olympus FE-210 Rear Casing, Battery: 1 단계, 이미지 2개 중 1개 Removing Olympus FE-210 Rear Casing, Battery: 1 단계, 이미지 2개 중 2개
    • The battery compartment is located on the bottom side of the camera. Push the button in, and slide the cover to get access to the batteries.

    댓글 쓰기

  2. Removing Olympus FE-210 Rear Casing: 2 단계, 이미지 2개 중 1개 Removing Olympus FE-210 Rear Casing: 2 단계, 이미지 2개 중 2개
    • The batteries will slide right out.

    • When putting new batteries in, make sure they are pointing the right direction.

    댓글 쓰기

  3. Removing Olympus FE-210 Rear Casing, Front Casing: 3 단계, 이미지 3개 중 1개 Removing Olympus FE-210 Rear Casing, Front Casing: 3 단계, 이미지 3개 중 2개 Removing Olympus FE-210 Rear Casing, Front Casing: 3 단계, 이미지 3개 중 3개
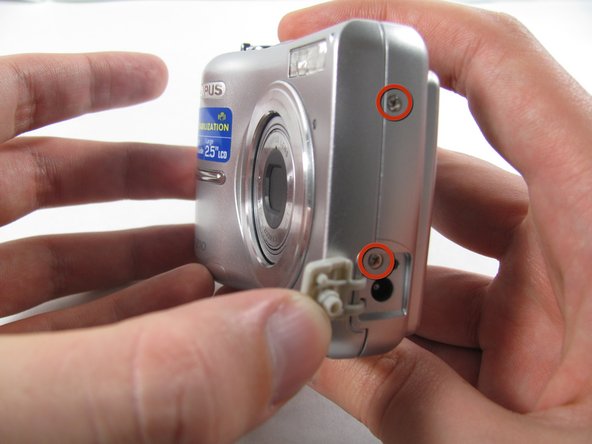
    • Remove the seven screws holding the front case in place, with a #00 screwdriver.

    • Six screws are 3.6 mm.

    • The seventh screw is 3.2 mm.

    댓글 쓰기

  4. Removing Olympus FE-210 Rear Casing: 4 단계, 이미지 3개 중 1개 Removing Olympus FE-210 Rear Casing: 4 단계, 이미지 3개 중 2개 Removing Olympus FE-210 Rear Casing: 4 단계, 이미지 3개 중 3개
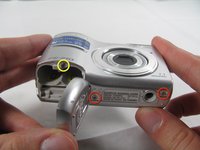
    • Apply enough pressure at the three snappable places to pull the front case off.

    • These three places are located:

    • At the top and bottom of the battery side (opposite of side pictured) of the case.

    • Right in the middle of the DC-in side (side pictured) of the case.

    • Top of the camera, to the left of the power button.

    • Once those places are disconnected, the front case will pop right off.

    • The camera in the first two pictures is upside down. This is the best position to place your thumbs to remove the case.

    댓글 쓰기

  5. Removing Olympus FE-210 Rear Casing, Rear Casing: 5 단계, 이미지 1개 중 1개
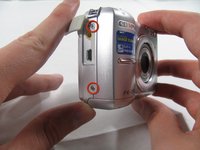
    • Remove the 3.2 mm screw in the battery compartment using a #00 screwdriver.

    • After removal of the screw the case will be loose, but do not tug it off. There is a cord connecting the rear controls to the motherboard.

    댓글 쓰기

  6. Removing Olympus FE-210 Rear Casing: 6 단계, 이미지 3개 중 1개 Removing Olympus FE-210 Rear Casing: 6 단계, 이미지 3개 중 2개 Removing Olympus FE-210 Rear Casing: 6 단계, 이미지 3개 중 3개
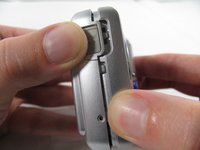
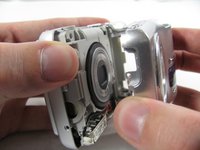
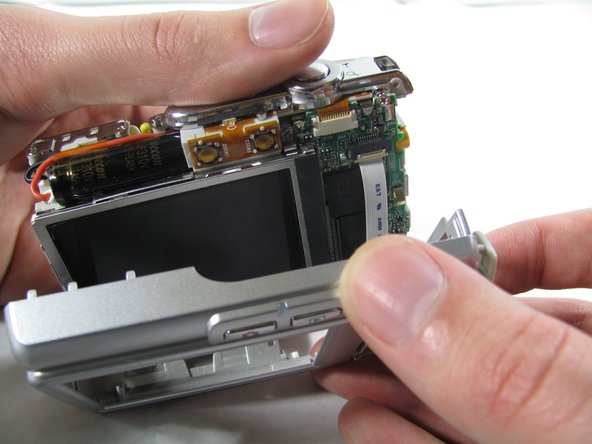
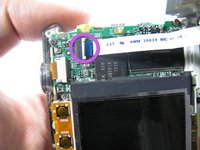
    • Carefully pull the rear case away from the camera until you have access to the cord connected to the motherboard.

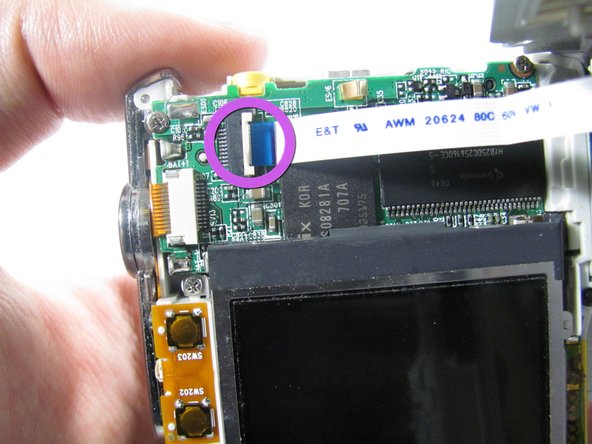
    • Lift the white latch using a fingernail or a spudger.

    • Pull the cord from its connector.

    댓글 쓰기

결론

To reassemble your device, follow these instructions in reverse order.

취소: 해당 안내서를 완성하지 않았습니다.

다른 한 분이 해당 안내서를 완성하였습니다.

작성자

4다른 기여자 명과 함께

Matt

회원 가입일: 01/25/11

826 평판

안내서 6개를 작성함

Cal Poly, Team 4-36, Regan Winter 2011 Cal Poly, Team 4-36, Regan Winter 2011 회원

CPSU-REGAN-W11S4G36

3 회원들

안내서 14개를 작성함

0가이드 댓글

댓글 쓰기

조회 통계:

지난 24시간: 3

지난 7일: 15

지난 30일: 85

전체 시간: 3,097