주요 콘텐츠로 건너뛰기

Replacing the SSD

필요한 것

  1. Replacing the SSD, Battery: 1 단계, 이미지 3개 중 1개 Replacing the SSD, Battery: 1 단계, 이미지 3개 중 2개 Replacing the SSD, Battery: 1 단계, 이미지 3개 중 3개
    • Unlock the battery latch on the right.

    • Unlock the battery lock on the left.

    • Remove the battery pack from its slot.

  2. Replacing the SSD, Access to Components 2: 2 단계, 이미지 3개 중 1개 Replacing the SSD, Access to Components 2: 2 단계, 이미지 3개 중 2개 Replacing the SSD, Access to Components 2: 2 단계, 이미지 3개 중 3개
    • Using the Philips # 0 screwdriver, unscrew the 2 screws of the top cover

    • Check the marks indicating the direction in which the cover must be removed.

    • Remove the bottom cover by removing it in the direction of the markers.

  3. Replacing the SSD: 3 단계, 이미지 1개 중 1개
    • Then appear the other components of the Laptop.

  4. Replacing the SSD, SSD disk: 4 단계, 이미지 3개 중 1개 Replacing the SSD, SSD disk: 4 단계, 이미지 3개 중 2개 Replacing the SSD, SSD disk: 4 단계, 이미지 3개 중 3개
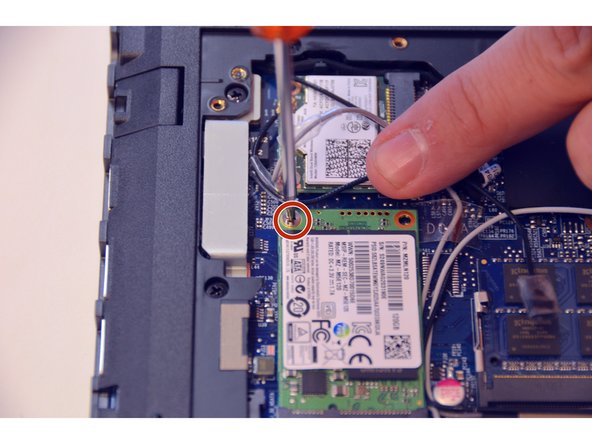
    • This is the SSD drive

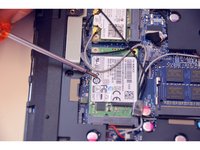
    • Unscrew the fixing screw of the SSD using the Philips # 0 screwdriver.
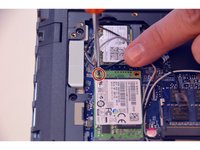
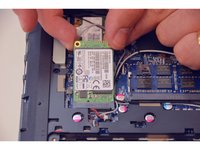
    • Remove the SSD.

  5. Replacing the SSD: 5 단계, 이미지 1개 중 1개
    • Here is the SSD drive out of its slot.

결론

For reassembly, follow the instructions in reverse order.

다음 번역가들에게 특별히 감사 드립니다:

fr en

100%

irlanda님은 저희가 세상을 수리하는데 동참하신 분입니다! 기여하시겠습니까?
번역 시작하기 ›

작성자

1다른 기여자 명과 함께

Felice Suglia

회원 가입일: 06/15/13

31,564 평판

안내서 264개를 작성함

댓글 0개

댓글 쓰기

조회 통계:

지난 24시간: 0

지난 7일: 4

지난 30일: 26

전체 시간: 1,409