소개
Use this guide to replace the USB-C port on your Retina MacBook 2015.
To avoid logic board damage, when your MacBook repair is complete but before powering it on, connect it to low-voltage power using a 5-Watt iPhone charger and a USB-C to USB-A cable. These accessories are not included with your MacBook, so make sure you have them ready before you begin.
필요한 것
동영상 개요
-
이 단계에 사용된 도구:Magnetic Project Mat$19.95
-
Remove the following eight screws securing the lower case:
-
Two 1.8 mm P5 Pentalobe screws
-
Four 2.9 mm P5 Pentalobe screws
-
Two 6.1 mm P5 Pentalobe screws
-
-
-
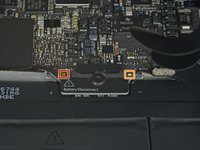
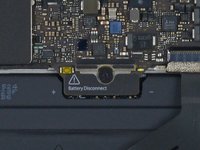
Use the flat end of a spudger to press and hold the small gold 'battery disconnect' button.
-
If the power LED is lit up, continue holding the button until the LED goes dark, and then release. This may take up to 10 seconds.
-
If the LED does not light, release the button after 5-10 seconds. Press and hold it again for 5-10 seconds, and release. Finally, press and hold it a third time for 5-10 seconds, and release.
-
-
-
Carefully turn the MacBook over, so that the lower case lays flat.
-
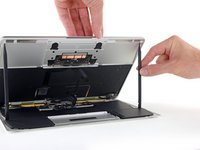
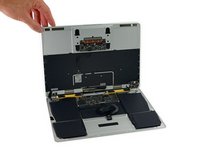
Raise the upper case/display assembly to about a 90° angle, and prop it up against something sturdy so you don't have to hold it.
-
Add a piece of tape near the track pad to secure the upper case and prevent accidental movement.
-
-
이 단계에 사용된 도구:Battery Blocker$3.99
-
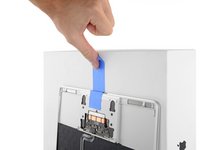
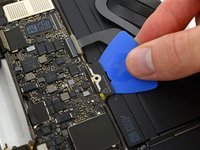
As an added precaution, you may physically disconnect the battery by inserting a battery isolation pick between the logic board and the battery connector.
-
-
-
이 단계에 사용된 도구:Tweezers$4.99
-
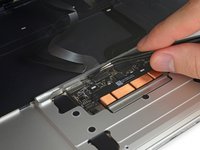
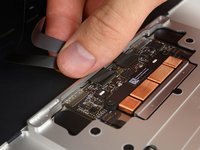
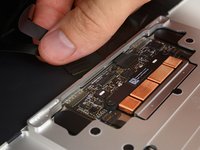
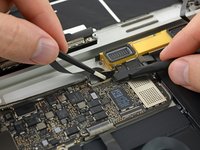
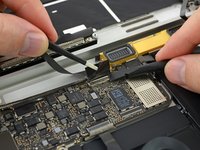
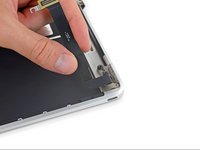
Use tweezers to peel back the tape covering the display cable connector.
-
-
-
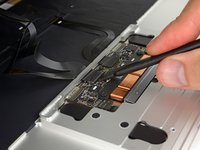
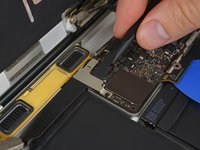
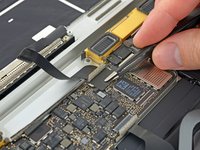
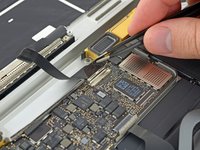
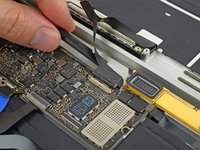
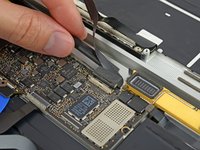
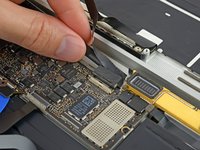
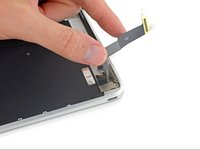
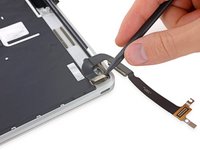
Use a spudger to flip open the ZIF connector retaining flap for the dual microphone assembly ribbon cable.
-
-
-
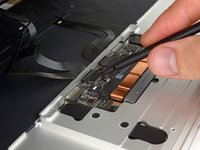
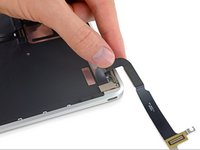
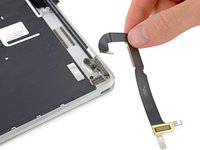
Remove the two 3.3 mm T5 Torx screws securing the display cable assembly.
-
-
-
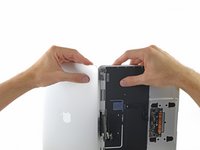
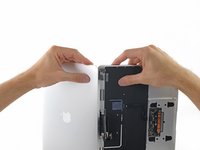
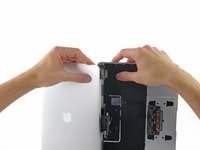
Holding the display assembly with one hand and the upper case with the other, push them together slightly to move the hinges out of their recesses in the the upper case.
-
Push the upper case forward while pulling back gently on the display.
-
Once the two display hinges have cleared the upper case, remove the display and set it aside.
-
-
-
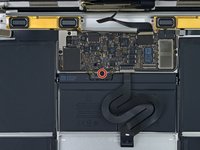
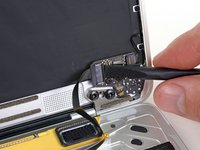
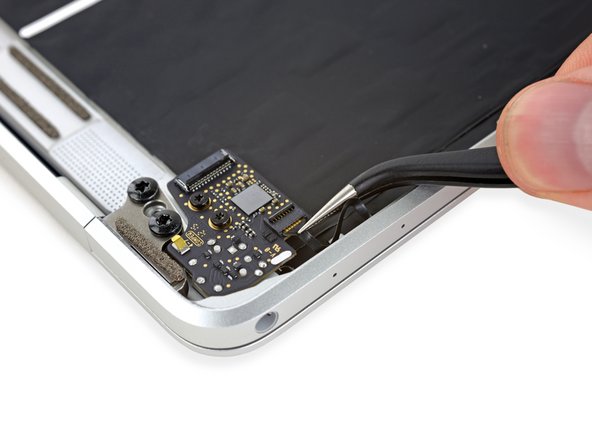
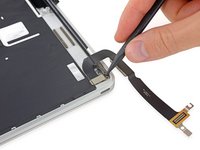
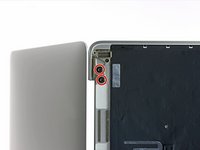
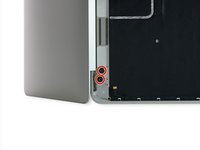
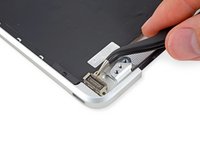
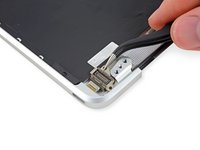
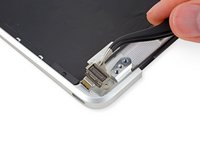
Remove the single 2.9 mm T3 Torx screw securing the USB-C port to the upper case.
-


To reassemble your device, follow these instructions in reverse order. To avoid logic board damage, when your MacBook repair is complete but before powering it on, connect it to low-voltage power using a 5-Watt iPhone charger and a USB-C to USB-A cable.
To reassemble your device, follow these instructions in reverse order. To avoid logic board damage, when your MacBook repair is complete but before powering it on, connect it to low-voltage power using a 5-Watt iPhone charger and a USB-C to USB-A cable.
다른 17명이 해당 안내서를 완성하였습니다.

댓글 7개
Can I just pay you to do it lol.
Only if you were here, I would pay you 400 to fix it. #NEVER BUYING
Is there a guide for the early 2015 MacBook pro?
Did it and worked perfectly! Only issue was that at about step 25 - 30 I noticed a small extra bracket on the tray. I can’t figure out what it is..
Check out here: