소개
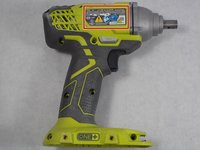
Use this guide to replace the magnetic tray in your Ryobi P235 impact driver if it is broken or missing.
The magnet tray located near the bottom of the Ryobi P235 impact driver can be used to hold screws, nails, and other magnet accessories during impact driving use.
Overtime the magnet tray can become damaged, faulty, or overall unusable. In this guide you will learn how to easily and effectively swap it out!
This replacement isn’t very challenging, but in any repair or replacement be careful and use proper safety equipment. It is recommended to wear eye protection incase of any flying repair parts. It is also recommended to wear gloves just in case one of the metal edges is charp. It is important to note that before the replacement remove the battery from the impact driver.
No special skills are needed in this repair! So have fun and enjoy your new magnet tray!
필요한 것
-
-
-
-
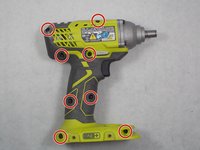
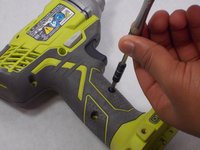
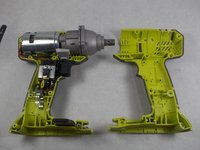
Use a Phillips #2 screwdriver to remove the eight 16 mm screws that secure the housing.
-
-
-
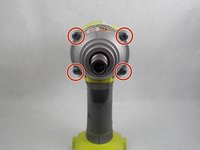
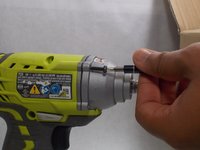
Use a T20 Torx screwdriver to remove the four 25.4 mm screws that secure the front of the housing.
-
-


 FixBot에 문의하기







To reassemble your device, follow these instructions in reverse order.

팀

UMass Dartmouth, Team S4-G2, Saloman Fall 2019 UMass Dartmouth, Team S4-G2, Saloman Fall 2019 회원
UMASSD-SALOMAN-F19S4G2
3 회원들
안내서 12개를 작성함
