소개
This replacement guild will should how to replace the motor in the Ryobi RJ1861V.
필요한 것
-
-
Use a Torx T5 screwdriver to remove the single 8 mm screw securing the shoe.
 FixBot에 문의하기
-
-
-
Use a Torx T5 screwdriver to remove the six screws on the underside of the device.
-
-
-
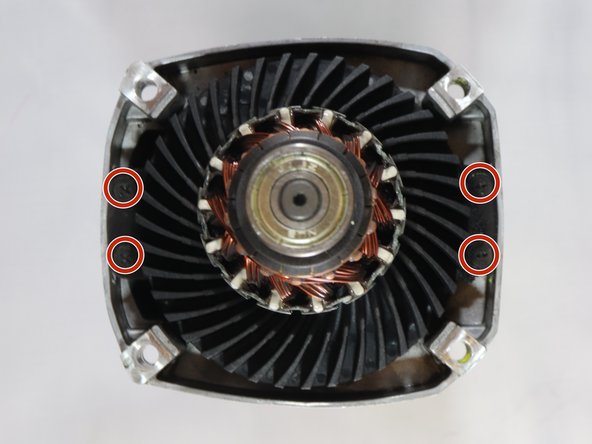
Use a Torx T5 screwdriver to remove the four screws on the top of the gear case.
-
-
-
-
Insert needle nose pliers to remove the retaining pin at the top of the bearing.
-
-
-
Once the retaining pin has been removed, pull off the damaged bearing and insert a new one.
-
-
-
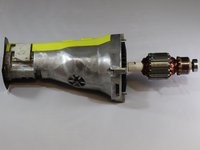
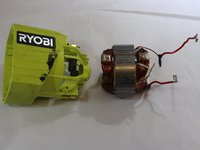
The motor is divided into two sections, one attached to the gear case and one attached to the handle.
-
This arrow indicates the section attached to the gear case.
-
This arrow indicates the section attached to the handle.
-
-
-
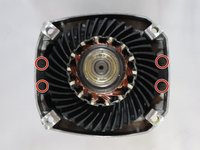
Use a Torx T5 screwdriver to remove the four screws attaching the motor to the gear case.
-
-
-
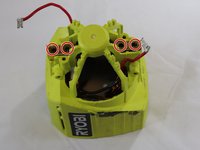
Use a Torx T5 screwdriver to remove the two screws inside the motor housing of the handle.
-
-
-
Remove the four screws on the back of the housing with a Torx T5 screwdriver.
-
Flip the housing over and pull the motor up and out of the housing.
-


To reassemble your device, follow these instructions in reverse order.
다른 한 분이 해당 안내서를 완성하였습니다.
팀

Eastern Washington University, Team S1-G1, Rowley Spring 2019 Eastern Washington University, Team S1-G1, Rowley Spring 2019 회원
EWU-ROWLEY-S19S1G1
3 회원들
안내서 3개를 작성함