소개
This guide may be used to remove the internal fans from the Samsung ATIV Book 9 Plus for replacement or cleaning. Have a Phillips screw driver handy. Make sure you are able to keep track of all the screws removed and where they belong (a magnetic project mat would be helpful). Replacement fans should be purchased from the laptop's original manufacturing company (fans can be bought online or in person from a Samsung retailer). Ensure that the former fans are disposed of properly, according to your city's ordinances. When removing the fans, make sure not to damage any cords connecting the fans to the laptop.
필요한 것
-
-
Turn the laptop upside down so that the underside of the laptop is facing you.
-
Use a Phillips #000 screwdriver to unscrew the 4.3 mm screws located on the edges and corners of the laptop.
 FixBot에 문의하기
-
-
-
-
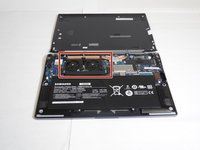
The fans should be in the upper left corner of the laptop if the laptop is oriented with the battery in the bottom half.
-
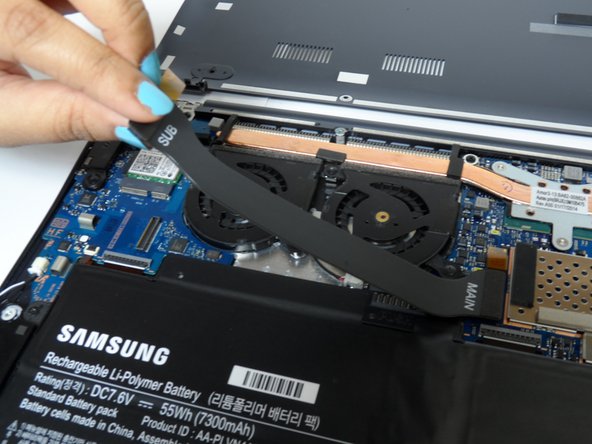
Gently lift the fans' black connector strip out of the way.
-
-
-
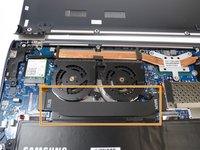
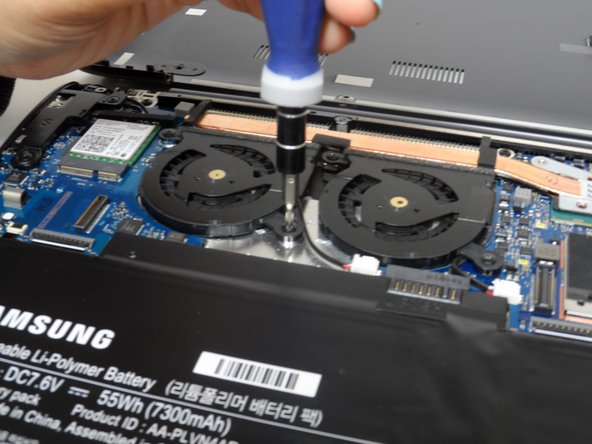
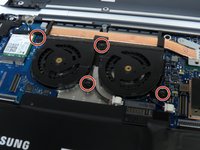
Using a Phillips head screwdriver, unscrew four 4.55 mm Phillips #000 screws that bind the fans.
-
-
-
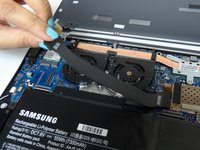
Disconnect the white connectors by gently tugging on them.
-
Lift the fans from their positions.
-


To reassemble your device, follow these instructions in reverse order.
다른 2명이 해당 안내서를 완성하였습니다.
팀

Baylor, Team 2-3, Grigsby Spring 2015 Baylor, Team 2-3, Grigsby Spring 2015 회원
BU-GRIGSBY-S15S2G3
4 회원들
안내서 4개를 작성함