소개
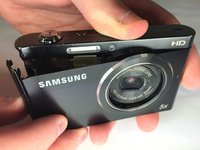
This guide will show how to remove the Back Button Control.
필요한 것
-
-
Remove the two black 4.2 mm screws on the right side of the camera using a Phillips #0 screwdriver.
-
Remove the two black 4.2 mm screws on the left side of the camera using a Phillips #0 screwdriver.
-
Remove the two black 4.2 mm screws on the bottom of the camera using a Phillips #0 screwdriver.
 FixBot에 문의하기
-
-
-
-
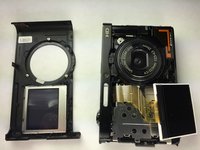
Remove the front case of the camera.
-
Remove the front LCD screen from the front case next to the lens.
-
-
-
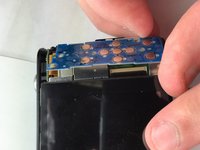
Remove the blue button control from its position next to the LCD screen.
-
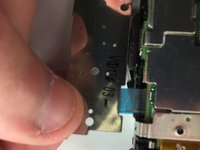
Pull the ribbon cable to disconnect the blue button control from the camera.
-


To reassemble your device, follow these instructions in reverse order.
다른 4명이 해당 안내서를 완성하였습니다.
팀

Baylor, Team 5-10, Williams Spring 2015 Baylor, Team 5-10, Williams Spring 2015 회원
BU-WILLIAMS-S15S5G10
3 회원들
안내서 10개를 작성함