소개
Is your laptop not loading pages correctly? Consider using this guide to replace the RAM in your laptop.
필요한 것
-
-
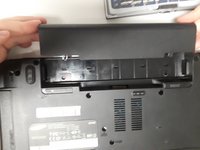
Flip the laptop over so that the bottom of the laptop is facing upwards.
 FixBot에 문의하기
-
-
-
-
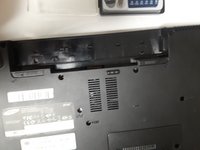
Unscrew and remove the two screws from the back panel labeled "Memory" with a Phillips #0 screwdriver.
-
-
-
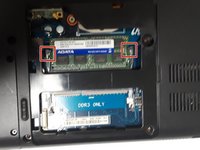
Place the flat end of the spudger or your fingers, if possible, between the panel and the laptop. Pry the panel by moving the spudger up and down until the panel can be removed.
-
-
-
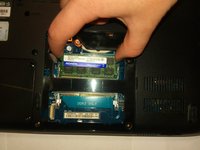
Release the two holding pins by pushing them away from each other with your fingers or a spudger.
-


To reassemble your device, follow these instructions in reverse order.
팀

University of North Texas, Team S6-G4, Thompson Fall 2018 University of North Texas, Team S6-G4, Thompson Fall 2018 회원
UNT-THOMPSON-F18S6G4
4 회원들
안내서 6개를 작성함