소개
Given the lack of protection through the lens opening, the elements of the CMOS sensor may be cracked or otherwise damaged during everyday use. The CMOS sensor assembly can be replaced as a whole; or, depending on the circumstances, some of the outer filters and screens can also be replaced with the assistance of this guide.
필요한 것
-
-
Using a Phillips #00 precision screwdriver, remove the seven 4mm screws (5 on the bottom of the device and 1 on each of the two sides) holding the back panel to the camera.
 FixBot에 문의하기
-
-
-
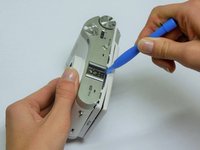
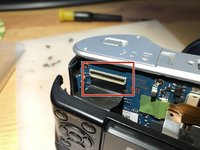
Using a Phillips #00 precision screwdriver, remove the last 4 mm screw located inside the input ports' compartment.
-
-
-
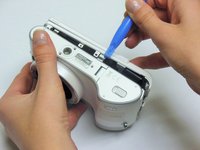
Place a plastic opening tool into the gap between the back panel and camera body, from both the top and the bottom of camera. Carefully pry open the camera and separate the back panel.
-
-
이 단계에 사용된 도구:Tweezers$4.99
-
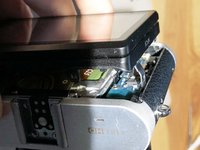
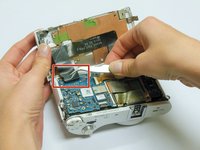
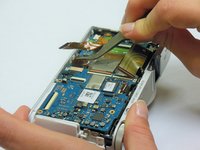
Using tweezers or your fingers, pull the display's black ribbon from the motherboard. This frees the back panel altogether.
-
-
-
-
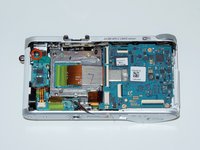
Using a Phillips #00 precision screwdriver, remove the three 4mm screws holding the motherboard in place.
-
-
이 단계에 사용된 도구:Tweezers$4.99
-
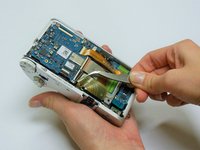
Using tweezers or a plastic opening tool, release the locks on the ribbon receptors by flicking up the black bars on the holds. Pull the five ribbons away from the motherboard (one hidden from view). This will free the motherboard completely from the device.
-
-
-
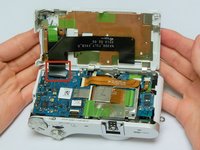
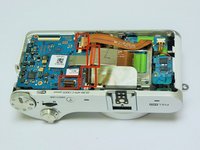
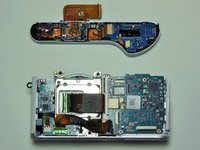
The motherboard is now free. Pull the motherboard up and slightly away from the input compartment; it will lift out easily.
-
-
-
Using a Phillips #00 screwdriver, remove the last 4mm screw attaching the top panel to the rest of the camera.
-
With the assistance of plastic opening tools, carefully unsnap the top panel, which contains the power switch, out of place.
-
-
-
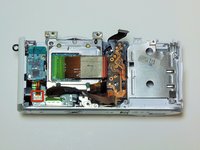
Using a 1.5mm HEX screwdriver, remove the three 5mm black screws located on the extensions of the metal housing assembly.
-
-
이 단계에 사용된 도구:Tweezers$4.99
-
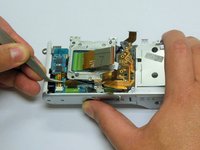
With the assistance of tweezers, pull out the last data ribbon connecting the sensor to the sound board. This ribbon must be pulled away from the board that houses the sound speaker.
-
-
-
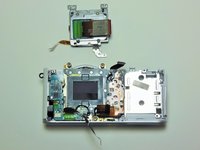
The entire CMOS sensor assembly is now free.
-
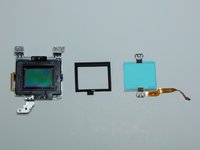
To replace the assembly's low-pass filter, infrared-absorption glass and/or the piezoelectric element only, use a Phillips #00 screwdriver to remove the two 4mm screws on the top and bottom sides of the sensor assembly.
-


To reassemble your device, follow these instructions in reverse order.
다른 5명이 해당 안내서를 완성하였습니다.

팀

USF Tampa, Team 9-6, Blackwell Winter 2015 USF Tampa, Team 9-6, Blackwell Winter 2015 회원
USFT-BLACKWELL-W15S9G6
4 회원들
안내서 12개를 작성함