소개
Using this repair guide, the user will be able to replace the flash option button on the device.
필요한 것
-
-
Place the camera upside down on a hard surface such as a table. Make sure that the battery compartment is visible.
 FixBot에 문의하기
-
-
-
Twist the nob counter-clockwise while pushing cover to the left. Then pull the cover up to reveal the battery.
-
-
-
Carefully slide the battery out of the camera. It can then be replaced with a new battery.
-
-
-
-
Remove the 6mm screws located on the bottom and sides of the camera using the using the screw driver with the JIS size 000 head.
-
-
-
Remove the two 6mm screws located underneath the battery cover using the same screw driver with the JIS size 000 head.
-
-
-
Carefully pry the face-plate away from the body of the camera, starting from the battery compartment. It should come off without too much trouble, although it may require force.
-
-
-
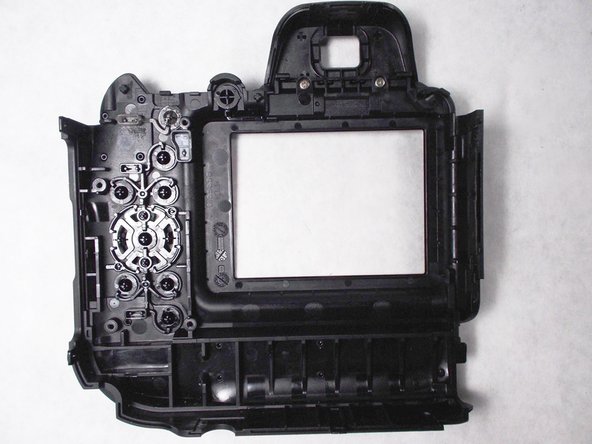
Looking at the back of the exposed face plate, remove the four 5mm screws, that hold down the metal cover, using the screw driver with the JIS size 000 head.
-
-
-
Clean out any dust or debris from the button interface.
-
Replace faulty button.
-


To reassemble your device, follow these instructions in reverse order.
팀

UMass Dartmouth, Team 5-4, Landers Spring 2016 UMass Dartmouth, Team 5-4, Landers Spring 2016 회원
UMASSD-LANDERS-S16S5G4
3 회원들
안내서 12개를 작성함