주요 콘텐츠로 건너뛰기

Sansa e260R Front Panel Replacement

필요한 것

  1. Sansa e260R Front Panel Replacement, Rear Case: 1 단계, 이미지 1/1
    • Before disassembling the device, make sure it is powered off.

    • Remove the four 1.5mm screws on the back of the device.

  2. Sansa e260R Front Panel Replacement: 2 단계, 이미지 1/1
    • Using a plastic opening tool, lift the metal backing from the front of the device.

  3. Sansa e260R Front Panel Replacement: 3 단계, 이미지 1/1
    • Pull the rear panel off of the Sansa e260R.

  4. Sansa e260R Front Panel Replacement, Battery: 4 단계, 이미지 1/1
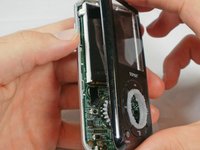
    • Grip the bottom of the battery with your thumb and forefinger and pull it away from the device.

  5. Sansa e260R Front Panel Replacement, Front Panel: 5 단계, 이미지 1/1
    • Remove the four 1.5mm screws on the inner casing of the device.

    • These screws are very small and hard to extract from the casing. It may be helpful to use a magnetic screwdriver.

  6. Sansa e260R Front Panel Replacement: 6 단계, 이미지 1/1
    • Flip the device so that the front is facing you.

    • Slide a plastic opening tool between the plastic front cover and the metal back cover of the device.

  7. Sansa e260R Front Panel Replacement: 7 단계, 이미지 1/2 Sansa e260R Front Panel Replacement: 7 단계, 이미지 2/2
    • Pull the front cover away from the rest of the device.

결론

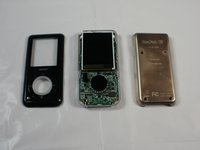
To reassemble your device, follow these instructions in reverse order.

Casey Smith

회원 가입일: 01/20/12

111 평판

안내서 3개 작성하였습니다

Cal Poly, Team 8-15, Maness Winter 2012 Cal Poly, Team 8-15, Maness Winter 2012 회원

CPSU-MANESS-W12S8G15

5 회원들

안내서 5개 작성하였습니다

댓글 0개

댓글 쓰기

조회 통계:

24 시간 전: 0

7일 전: 0

30일 전: 2

전체 시간: 1,966