소개
If the buttons on the Seville Classics MSC10166 Tower Fan become broken or sticky, you can use this guide to replace the buttons.
Broken buttons can make it hard turn on or change the settings, which can impact the functionality of your fan.
You will not need any special skills in order to complete this project.
Before you begin, make sure the fan is off and unplugged, as you will be touching wires and circuit boards.
필요한 것
-
-
Use the Phillips #2 screwdriver to remove the four 6 mm screws by unscrewing counterclockwise.
 FixBot에 문의하기
-
-
-
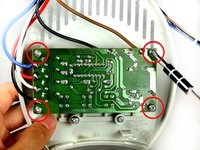
Remove the Phillips 6 mm screw that holds the circuit board to the outer shell of the fan.
-
-
-
-
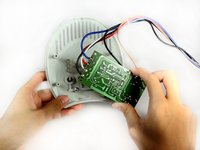
Remove the top cover containing the circuit board and the wires by pulling it away from the outer shell of the fan.
-
-
-
Remove the screws from the four corners of the circuit board.
-
Remove the circuit board from the top cover.
-
-
-
Remove the two 8 mm screws that attach the buttons to the top cover of the fan.
-


To reassemble your device, follow these instructions in reverse order.
다른 2명이 해당 안내서를 완성하였습니다.
팀

Cal Poly, Team 15-46, Forte Fall 2012 Cal Poly, Team 15-46, Forte Fall 2012 회원
CPSU-FORTE-F12S15G46
5 회원들
안내서 6개를 작성함
2가이드 댓글
Great work but our problem is the micro switch itself, after exposing the circuit board I shorted the backside solder connections to cycle the fan on and off, everything works perfectly…..now I only need to know a part number so I can find a on/off micro switch.
any suggestions?
Thanks for any help you can provide
rickkingsbury@comcast.net
Is there a way to keep the fan in ALWAYS ON position. So I can control it’s ON/OFF using a smart plug?
Vish Talreja - 답글 공유