소개
The user will learn how to:
- Remove the device from the case
- Locate the memory card
- Remove memory card
- Insert memory card
-
-
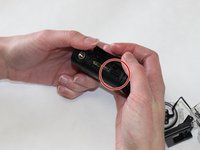
Use your thumb to push down on the lever that says "open" while simultaneously pushing up the latch with your other thumb.
 FixBot에 문의하기
-
-
-
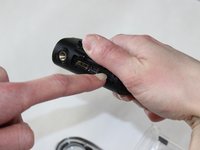
Once the latch is free, simply pull the front of the waterproof case off and slide the camera out.
-
-
-
-
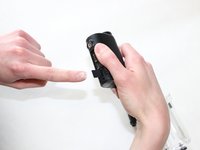
Locate the micro SD port at the bottom of the device by lifting up the panel.
-
-
-
To remove the micro SD card from the device, gently push the SD card and release. The SD card will pop out.
-
-
-
When putting a micro SD card back into the device, be sure to place the exposed metal side up, as well as have the device LCD screen side up.
-


To reassemble your device, follow these instructions in reverse order.
다른 2명이 해당 안내서를 완성하였습니다.
팀

University of Kentucky Louisville, Team 1-6, Matravers Spring 2016 University of Kentucky Louisville, Team 1-6, Matravers Spring 2016 회원
LOUISVILLE-MATRAVERS-S16S1G6
4 회원들
안내서 6개를 작성함