소개
This guide will outline all the steps necessary to reattach a SkullCandy Hesh size adjuster that's snapped. Exposed wires in this area will result in either a cessation in sound production, or sound being produced in only one side of the device. When troubleshooting sound problems, this is the last solution to check, as it requires the most time.
필요한 것
-
-
Use a Phillips #0 screwdriver to remove the two 9 mm screws from the bottom inner casing beneath the break.
-
-
-
-
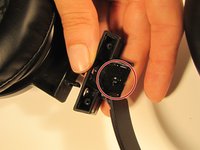
Remove the bottom inner casing to reveal the wire compartment and the port where the slider inserts.
-
-
-
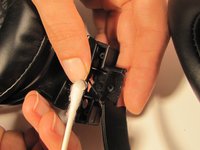
Cover the detached slider port in a generous layer of Plasti Dip, which works like glue. Also coat any exposed wire to seal the circuit.
-
-
-
Realign the broken size adjuster into the port with the Plasti Dip so that it can be secured to the ear piece.
-
-
-
Clamp the pieces in place by hand or with a binder clip until the Plasti Dip dries. Feel free to use a hair dryer on a low setting to speed up the process.
-


To reassemble your device, reattach the bottom inner casing with the Phillips #0 screwdriver and two removed screws.
팀

USF Sarasota-Manatee, Team 1-1, Stewart Winter 2015 USF Sarasota-Manatee, Team 1-1, Stewart Winter 2015 회원
USFSM-STEWART-W15S1G1
4 회원들
안내서 10개를 작성함