소개
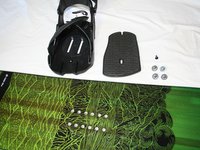
The purpose of this guide is to show you how to remove/replace all of the straps on your bindings. However, you do not need to remove the toe straps to replace the ankle straps and vice versa. Begin this repair guide at the appropriate step relevant to your problem.
필요한 것
-
-
-
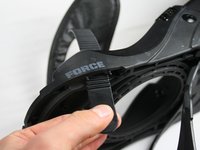
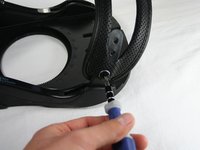
Release the binding straps by lifting up on the buckle and pulling towards the direction of the end of the ladder.
 FixBot에 문의하기
-
-
-
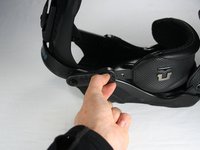
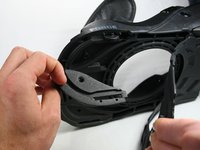
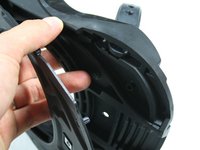
Move the straps and the highback plate out of the way in order to have clear access to the foot pad screw.
-
-
-
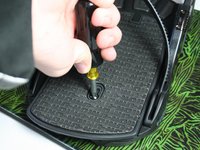
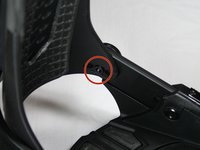
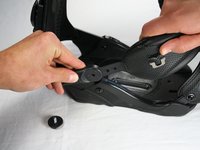
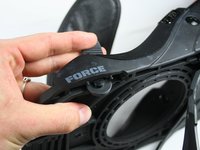
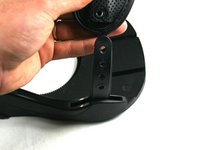
Use a #2 Phillips screwdriver to remove the panhead, 10mm wide, M4 x 12mm screw located in the middle of the foot pad.
-
-
-
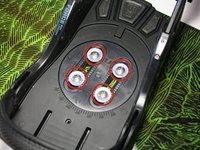
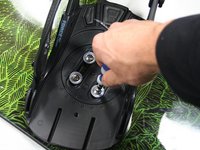
Use a #2 Phillips screwdriver to remove the four ovalhead M6 x 12mm screws that attach the base plate of the binding to the board.
-
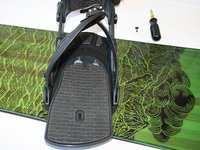
Lift or slide the binding off the board and set the screws aside.
-
-
-
-
-
-
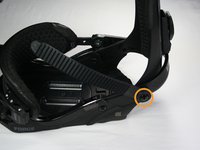
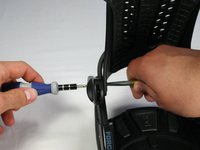
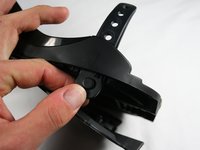
Use a 5.5mm flathead screwdriver to anchor the backing bracket located on the inside of the binding.
-
Using a Phillips #2 screwdriver, unscrew the countersunk ovalhead M4 x 16mm screw connecting the heel strap ladder to the binding.
-
-
-
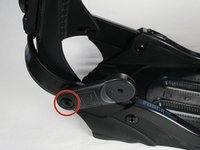
Unscrew the 10mm long thumb screw connecting the heel strap with its binding connector.
-
Pull the heel strap apart from its binding connector.
-
-
-
Use a 5.5mm flathead screwdriver to anchor the backing bracket located on the inside of the binding.
-
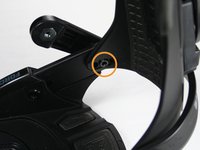
Using a Phillips #2 screwdriver, locate and unscrew the countersunk ovalhead M4 x 16mm screw holding the heel strap connector to the binding.
-
-
-
Flip the binding so that the bottom is accessible.
-
Using your hands, pry off the plastic bottom covering starting at the toe end.
-
-
-
Remove the corner foam coverings by grabbing one edge and lifting up.
-
Slide out the toe strap ladder.
-
-
-
Using a Phillips #2 screwdriver, unscrew the button head M4 x 10mm screw holding the toe strap with its connector.
-
Slide the toe strap off of the toe strap connector.
-
-


To reassemble your device, follow these instructions in reverse order.
다른 한 분이 해당 안내서를 완성하였습니다.
팀

Cal Poly, Team 17-4, Forte Winter 2014 Cal Poly, Team 17-4, Forte Winter 2014 회원
CPSU-FORTE-W14S17G4
5 회원들
안내서 11개를 작성함