주요 콘텐츠로 건너뛰기
수리 커뮤니티 가입 - 계정 만들기

SodaStream Source Microchip Replacement

필요한 것

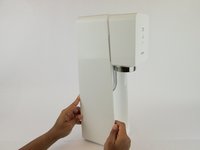
    1. SodaStream Source Microchip Replacement, SodaStream Source External Disassembly: 1 단계, 이미지 3개 중 1개 SodaStream Source Microchip Replacement, SodaStream Source External Disassembly: 1 단계, 이미지 3개 중 2개 SodaStream Source Microchip Replacement, SodaStream Source External Disassembly: 1 단계, 이미지 3개 중 3개
      • Remove the soda bottle and the CO₂ canister from the machine.

      댓글 쓰기

    2. SodaStream Source Microchip Replacement: 2 단계, 이미지 2개 중 1개 SodaStream Source Microchip Replacement: 2 단계, 이미지 2개 중 2개
      이 단계에 사용된 도구:
      Phillips #1 Screwdriver
      $8.99

      댓글 쓰기

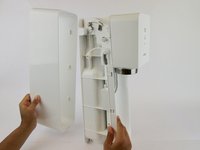
    3. SodaStream Source Microchip Replacement: 3 단계, 이미지 2개 중 1개 SodaStream Source Microchip Replacement: 3 단계, 이미지 2개 중 2개
      • Pull the outer cover away from the front of the device.

      댓글 쓰기

    4. SodaStream Source Microchip Replacement: 4 단계, 이미지 1개 중 1개
      이 단계에 사용된 도구:
      Phillips #1 Screwdriver
      $8.99

      댓글 쓰기

    5. SodaStream Source Microchip Replacement: 5 단계, 이미지 2개 중 1개 SodaStream Source Microchip Replacement: 5 단계, 이미지 2개 중 2개
      이 단계에 사용된 도구:
      Jimmy
      $7.95
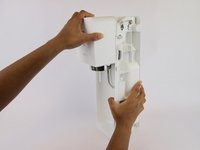
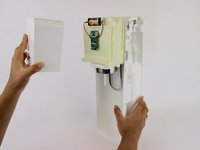
      • Firmly pull the front cover off.

      • This piece is difficult to remove and requires force. It may help to use a wide, thin object to pry it off (like a Jimmy).

      댓글 쓰기

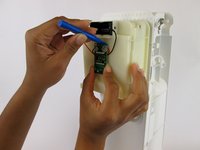
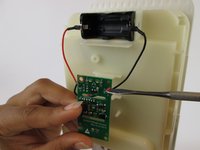
    1. SodaStream Source Microchip Replacement, Microchip: 6 단계, 이미지 1개 중 1개
      • Remove the 9.1 mm screw from the microchip.

      댓글 쓰기

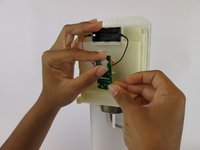
    2. SodaStream Source Microchip Replacement: 7 단계, 이미지 3개 중 1개 SodaStream Source Microchip Replacement: 7 단계, 이미지 3개 중 2개 SodaStream Source Microchip Replacement: 7 단계, 이미지 3개 중 3개
      • Wedge the plastic spudger between the microchip and the glue dot until the glue pops off.

      댓글 쓰기

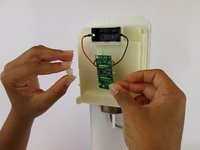
    3. SodaStream Source Microchip Replacement: 8 단계, 이미지 3개 중 1개 SodaStream Source Microchip Replacement: 8 단계, 이미지 3개 중 2개 SodaStream Source Microchip Replacement: 8 단계, 이미지 3개 중 3개
      이 단계에 사용된 도구:
      Spudger
      $2.99
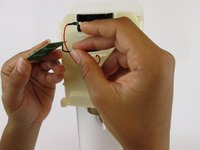
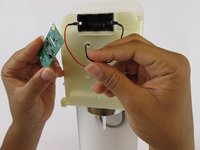
      • Use the spudger to lift the edge of the wire and pull the wire out of the microchip.

      • Use an ESD tool such as a nylon spudger when working with potentially dangerous electronics.

      • While reconnecting the wires, you will need a hot glue gun to reattach the wire ends to the new chip.

      댓글 쓰기

결론

To reassemble your device, follow these instructions in reverse order.

취소: 해당 안내서를 완성하지 않았습니다.

다른 한 분이 해당 안내서를 완성하였습니다.

작성자

4다른 기여자 명과 함께

Angela Mossgrove

회원 가입일: 02/20/17

1,213 평판

안내서 3개를 작성함

USF Tampa, Team S1-G4, Leahy Spring 2017 USF Tampa, Team S1-G4, Leahy Spring 2017 회원

USFT-LEAHY-S17S1G4

3 회원들

안내서 48개를 작성함

4가이드 댓글

Great information, but is there someone out there offering this repair as a service, I’m not motivated enough to do this myself and happy to pay someone to do it for me

matteo barnett - 답글 공유

Where can you buy the microchip please?

Jill - 답글 공유

Where can you purchase a replacement microchip from?

David Grosz - 답글 공유

Where can I find the reassemble source at

mcphersonp411 - 답글 공유

댓글 쓰기

조회 통계:

지난 24시간: 3

지난 7일: 19

지난 30일: 88

전체 시간: 6,082