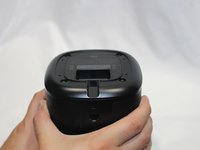
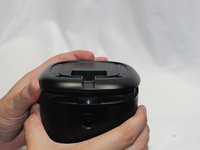
주요 콘텐츠로 건너뛰기

Sonos One Control Panel & Microphone Replacement

필요한 것

  1. Sonos One Control Panel & Microphone Replacement, Protective Cover: 1 단계, 이미지 1/3 Sonos One Control Panel & Microphone Replacement, Protective Cover: 1 단계, 이미지 2/3 Sonos One Control Panel & Microphone Replacement, Protective Cover: 1 단계, 이미지 3/3
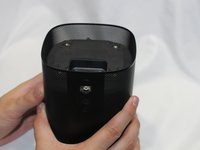
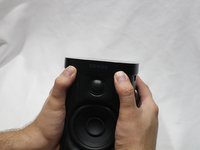
    • Disconnect all power cords.

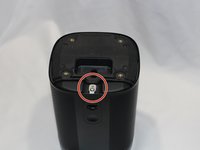
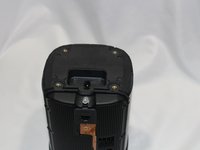
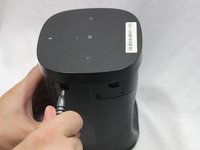
    • Remove the rubber foot and plastic screw guard on the bottom of the device using a plastic opening tool.

    • Note: the rubber foot and plastic screw guard can be removed as one piece to make reassembly easier

  2. Sonos One Control Panel & Microphone Replacement: 2 단계, 이미지 1/3 Sonos One Control Panel & Microphone Replacement: 2 단계, 이미지 2/3 Sonos One Control Panel & Microphone Replacement: 2 단계, 이미지 3/3
    • Remove the four 10mm Torx T10 screws from the bottom of the speaker.

  3. Sonos One Control Panel & Microphone Replacement: 3 단계, 이미지 1/2 Sonos One Control Panel & Microphone Replacement: 3 단계, 이미지 2/2
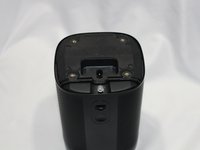
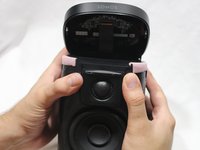
    • Remove the bottom cover by squeezing the protective cover slightly while pushing up with your fingers.

  4. Sonos One Control Panel & Microphone Replacement: 4 단계, 이미지 1/3 Sonos One Control Panel & Microphone Replacement: 4 단계, 이미지 2/3 Sonos One Control Panel & Microphone Replacement: 4 단계, 이미지 3/3
    • The protective cover clip is very thin and deforms easily.

    • Remove the single 8mm Torx T10 screw and protective cover clip.

  5. Sonos One Control Panel & Microphone Replacement: 5 단계, 이미지 1/2 Sonos One Control Panel & Microphone Replacement: 5 단계, 이미지 2/2
    • Slide the protective cover upwards to remove.

  6. Sonos One Control Panel & Microphone Replacement, Control Panel & Microphone: 6 단계, 이미지 1/3 Sonos One Control Panel & Microphone Replacement, Control Panel & Microphone: 6 단계, 이미지 2/3 Sonos One Control Panel & Microphone Replacement, Control Panel & Microphone: 6 단계, 이미지 3/3
    • Use the pointed end of a spudger to remove the covers that hide the screws.

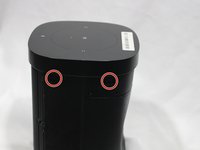
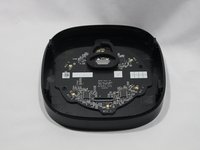
    • Remove the four 9mm Torx T8 screws from around the perimeter of the control panel.

  7. Sonos One Control Panel & Microphone Replacement: 7 단계, 이미지 1/2 Sonos One Control Panel & Microphone Replacement: 7 단계, 이미지 2/2
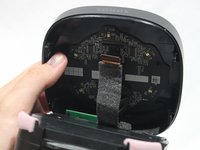
    • With the front of the unit facing you, lift the control panel up using your thumbs.

    • There's a ribbon cable attaching the control panel to the speaker so work slowly.

  8. Sonos One Control Panel & Microphone Replacement: 8 단계, 이미지 1/3 Sonos One Control Panel & Microphone Replacement: 8 단계, 이미지 2/3 Sonos One Control Panel & Microphone Replacement: 8 단계, 이미지 3/3
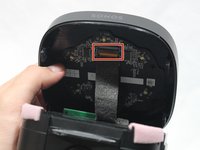
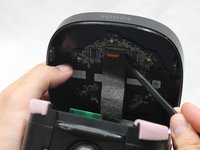
    • Use a spudger to flip up the retaining flap on the control panel ribbon cable ZIF socket.

    • Pull the control panel ribbon cable out of its socket.

  9. Sonos One Control Panel & Microphone Replacement: 9 단계, 이미지 1/2 Sonos One Control Panel & Microphone Replacement: 9 단계, 이미지 2/2
    • Pull the control panel away from the speaker to separate.

결론

To reassemble your device, follow these instructions in reverse order.

다른 한 분이 해당 안내서를 완성하였습니다.

Marcus Glowa

회원 가입일: 02/14/18

848 평판

안내서 5개 작성하였습니다

USF Tampa, Team S2-G1, Nance Spring 2018 USF Tampa, Team S2-G1, Nance Spring 2018 회원

USFT-NANCE-S18S2G1

3 회원들

안내서 6개 작성하였습니다

댓글 한 개

where can I buy a replacement control panel?

Chris Myers - 답글

댓글 쓰기

조회 통계:

24 시간 전: 0

7일 전: 6

30일 전: 48

전체 시간: 6,153