필요한 것
-
-
Plug in the Blu-Ray player, then press the power button, making sure the Blu-Ray player is powered on.
-
Press the eject button on either the top of the Blu-Ray player or on the remote to open the disc tray.
 FixBot에 문의하기
-
-
-
Grab the sides of the disc tray cover and carefully pull each side upwards, starting with the left side. This will unhook the cover from the tray.
-
-
-
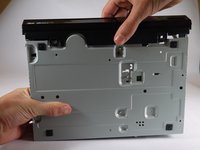
Locate the three 8 mm screws on the back of the Blu-Ray player.
-
Using the Phillips #2 screwdriver, unscrew each of the screws and set them aside.
-
-
-
-
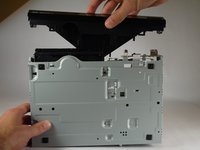
Insert the nylon or metal spudger under the clip on the side near the front of the device. Lift the clip so it is free from the device.
-
-
-
Flip device over so the bottom faces you.
-
Insert the nylon or metal spudger and lift the two clips on the bottom of the device.
-
-
-
Lift the clip on the opposite side of the device with the nylon or metal spudger.
-
-
-
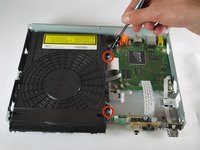
Using a Phillips #2 screwdriver, remove the two silver 8 mm screws on the right side of the disk tray .
-
-
-
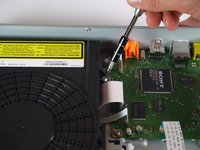
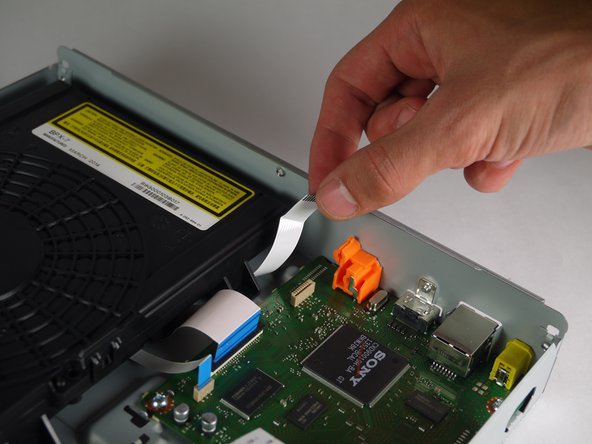
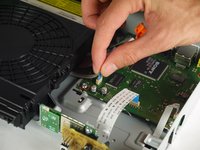
Pull the medium-sized 9 pin ribbon cable out of its connector on the motherboard.
-
-
이 단계에 사용된 도구:Tweezers$4.99
-
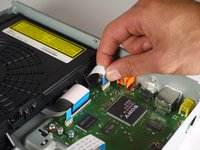
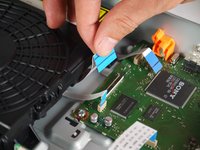
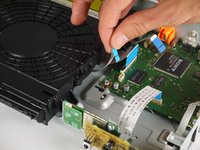
Using tweezers, lift up the tab of the large 45 pin connector on the motherboard.
-
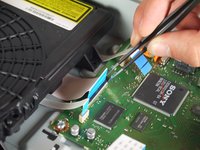
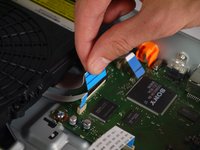
Pull the large 45 pin ribbon cable out of its connector.
-
-
-
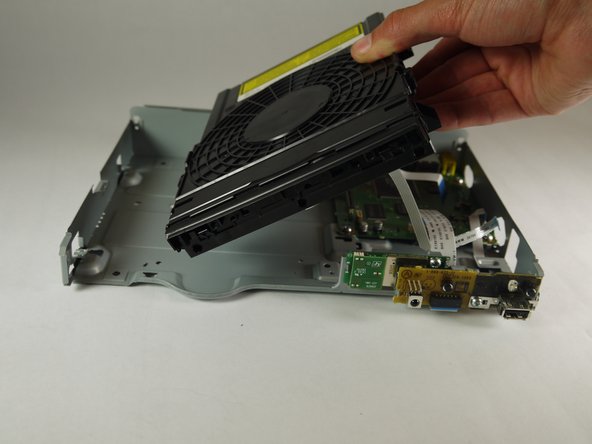
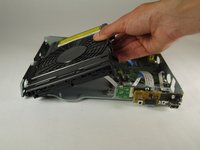
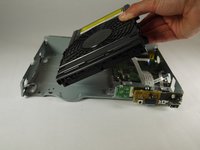
Slide the disk tray out from under the tabs on the case holding it down while lifting it out of the case.
-


To reassemble your device, follow these instructions in reverse order.
다른 6명이 해당 안내서를 완성하였습니다.
팀

Cal Poly, Team 8-41, Amido Winter 2015 Cal Poly, Team 8-41, Amido Winter 2015 회원
CPSU-AMIDO-W15S8G41
4 회원들
안내서 8개를 작성함
3가이드 댓글
Thanks, this helped a lot. I still cant get the DVD drawer to eject with the eject button. The power light will not turn off.
tomcerecedes - 답글 공유
Thank you thank you thank you. I spent an hour on the phone with Sony “technical support “ and was told nothing could be done except to send it off for servicing. This worked PERFECTLY!!!! THANKS AGAIN ?
Susan Brown - 답글 공유