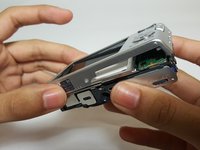
주요 콘텐츠로 건너뛰기

Sony Cyber-Shot DSC-W830 Button Board Replacement

필요한 것

  1. Sony Cyber-Shot DSC-W830 Button Board Replacement, Battery: 1 단계, 이미지 1개 중 1개
    • Slide the lock at the bottom of the camera to "Open".

    • The door to the battery pack is spring loaded.

  2. Sony Cyber-Shot DSC-W830 Button Board Replacement: 2 단계, 이미지 1개 중 1개
    • Slide the blue clip up and away from the battery.

  3. Sony Cyber-Shot DSC-W830 Button Board Replacement: 3 단계, 이미지 1개 중 1개
    • Remove the battery.

  4. Sony Cyber-Shot DSC-W830 Button Board Replacement, Front and Back Panel: 4 단계, 이미지 3개 중 1개 Sony Cyber-Shot DSC-W830 Button Board Replacement, Front and Back Panel: 4 단계, 이미지 3개 중 2개 Sony Cyber-Shot DSC-W830 Button Board Replacement, Front and Back Panel: 4 단계, 이미지 3개 중 3개
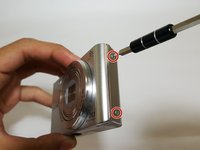
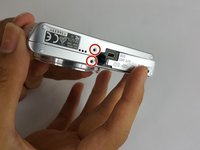
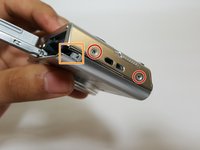
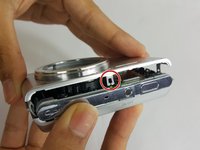
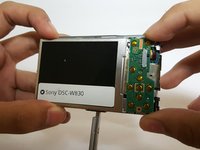
    • Remove the six 3.5mm Phillips #000 screws.

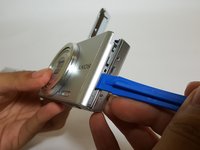
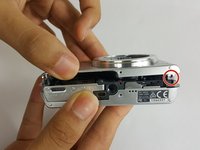
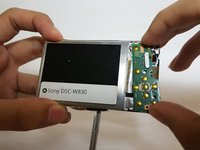
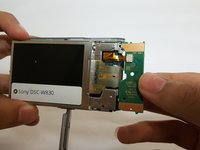
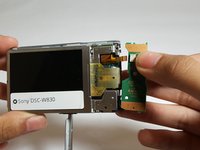
    • Rotate the lock away from the camera.

  5. Sony Cyber-Shot DSC-W830 Button Board Replacement: 5 단계, 이미지 3개 중 1개 Sony Cyber-Shot DSC-W830 Button Board Replacement: 5 단계, 이미지 3개 중 2개 Sony Cyber-Shot DSC-W830 Button Board Replacement: 5 단계, 이미지 3개 중 3개
    • Pry the device open with the plastic opening tool.

    • There are two clips that help prevent the front panel from separating.

  6. Sony Cyber-Shot DSC-W830 Button Board Replacement: 6 단계, 이미지 3개 중 1개 Sony Cyber-Shot DSC-W830 Button Board Replacement: 6 단계, 이미지 3개 중 2개 Sony Cyber-Shot DSC-W830 Button Board Replacement: 6 단계, 이미지 3개 중 3개
    • Remove the two plastic spacers between the front and the back panels.

    • The spacers may fall out when removing the panels.

    • Carefully remove the back panel.

  7. Sony Cyber-Shot DSC-W830 Button Board Replacement, Button Board: 7 단계, 이미지 2개 중 1개 Sony Cyber-Shot DSC-W830 Button Board Replacement, Button Board: 7 단계, 이미지 2개 중 2개
    • Gently release the button board from the clips.

    • Be careful when lifting the button board; the ribbon cable will still be attached.

  8. Sony Cyber-Shot DSC-W830 Button Board Replacement: 8 단계, 이미지 2개 중 1개 Sony Cyber-Shot DSC-W830 Button Board Replacement: 8 단계, 이미지 2개 중 2개
    • Disconnect the no-fuss ribbon cable by gently pulling it out of the button board.

결론

To reassemble your device, follow these instructions in reverse order.

다른 한 분이 해당 안내서를 완성하였습니다.

작성자

4다른 기여자 명과 함께

Addyson Salalila

회원 가입일: 09/15/16

316 평판

안내서 2개를 작성함

USF Tampa, Team 17-1, Blackwell Fall 2016 USF Tampa, Team 17-1, Blackwell Fall 2016 회원

USFT-BLACKWELL-F16S17G1

4 회원들

안내서 6개를 작성함

0가이드 댓글

댓글 쓰기

조회 통계:

지난 24시간: 0

지난 7일: 7

지난 30일: 18

전체 시간: 1,720