주요 콘텐츠로 건너뛰기

Sony PlayStation 3D Display Power Port Replacement

필요한 것

  1. Sony PlayStation 3D Display Power Port Replacement, Rear Case: 1 단계, 이미지 1/2 Sony PlayStation 3D Display Power Port Replacement, Rear Case: 1 단계, 이미지 2/2
    • Remove the base by pushing in the button and sliding out the unit.

  2. Sony PlayStation 3D Display Power Port Replacement: 2 단계, 이미지 1/3 Sony PlayStation 3D Display Power Port Replacement: 2 단계, 이미지 2/3 Sony PlayStation 3D Display Power Port Replacement: 2 단계, 이미지 3/3
    • Remove USB port cover from back plate with a metal spudger.

    • This will prevent the cover from falling under the back plate once it is removed.

  3. Sony PlayStation 3D Display Power Port Replacement: 3 단계, 이미지 1/2 Sony PlayStation 3D Display Power Port Replacement: 3 단계, 이미지 2/2
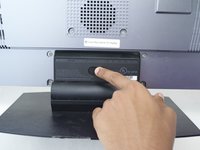
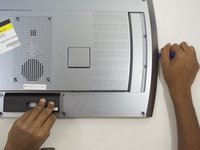
    • With the Phillips #02 screwdriver, remove the six 6 mm length x 6 mm head screws from the back plate.

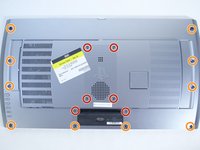
    • With the Phillips #02 screwdriver, remove the ten 6 mm length x 8 mm head screws from the back plate.

    • These screws have different threads and need to be kept separate.

  4. Sony PlayStation 3D Display Power Port Replacement: 4 단계, 이미지 1/3 Sony PlayStation 3D Display Power Port Replacement: 4 단계, 이미지 2/3 Sony PlayStation 3D Display Power Port Replacement: 4 단계, 이미지 3/3
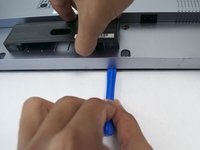
    • Remove back plate with a plastic opening tool by slowing prying around the entire plate.

    • Be gentle to avoid breaking the plastic clips which hold the plate.

    • Once separated the plate easily lifts off.

  5. Sony PlayStation 3D Display Power Port Replacement, Power Port: 5 단계, 이미지 1/3 Sony PlayStation 3D Display Power Port Replacement, Power Port: 5 단계, 이미지 2/3 Sony PlayStation 3D Display Power Port Replacement, Power Port: 5 단계, 이미지 3/3
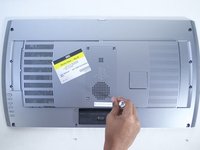
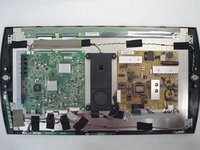
    • With the Phillips #02 screwdriver, remove the two 5mm length x 7mm head screws from the left and right side of the power port plate.

  6. Sony PlayStation 3D Display Power Port Replacement: 6 단계, 이미지 1/3 Sony PlayStation 3D Display Power Port Replacement: 6 단계, 이미지 2/3 Sony PlayStation 3D Display Power Port Replacement: 6 단계, 이미지 3/3
    • Remove the power port by depressing the white tab attached to the wires.

결론

To reassemble your device, follow these instructions in reverse order.

다른 한 분이 해당 안내서를 완성하였습니다.

Logan Simon

회원 가입일: 10/08/15

234 평판

안내서 1개 작성함

Cal Poly, Team 12-16, Maness Fall 2015 Cal Poly, Team 12-16, Maness Fall 2015 회원

CPSU-MANESS-F15S12G16

4 회원들

안내서 8개 작성하였습니다

댓글 0개

댓글 쓰기

조회 통계:

24 시간 전: 0

7일 전: 1

30일 전: 10

전체 시간: 1,525