주요 콘텐츠로 건너뛰기
수리 커뮤니티 가입 - 계정 만들기

Sony SRS-XB30 Bluetooth Chip Replacement

필요한 것

    1. Sony SRS-XB30 Bluetooth Chip Replacement, Battery: 1 단계, 이미지 1개 중 1개
      • To remove the speaker grill, insert the big spudger underneath it in each corner.

      • Work around the edges to pry the grill up and off.

      댓글 쓰기

    2. Sony SRS-XB30 Bluetooth Chip Replacement: 2 단계, 이미지 2개 중 1개 Sony SRS-XB30 Bluetooth Chip Replacement: 2 단계, 이미지 2개 중 2개
      • With the Sony logo facing towards you, use the medium spudger to lift the side plates from the internal frame.

      • This will need to be done on all four sides of the speaker to remove all four panels

      • This requires some effort because the adhesive is sticky.

      댓글 쓰기

    3. Sony SRS-XB30 Bluetooth Chip Replacement: 3 단계, 이미지 2개 중 1개 Sony SRS-XB30 Bluetooth Chip Replacement: 3 단계, 이미지 2개 중 2개
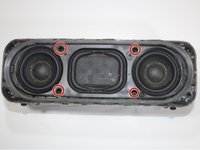
      • Locate the four screws on the now exposed front panel.

      • Using the screwdriver with bit T7, unscrew each screw (15.0 mm long).

      댓글 쓰기

    4. Sony SRS-XB30 Bluetooth Chip Replacement: 4 단계, 이미지 1개 중 1개
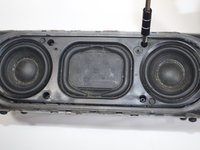
      • Next, remove the four outer edge screws, located on each corner of the speaker. The outer edge of the speaker is a clear plastic.

      • Use the same T7 screwdriver head here.

      • Remove each of the four corner screws (15.0 mm long).

      댓글 쓰기

    5. Sony SRS-XB30 Bluetooth Chip Replacement: 5 단계, 이미지 1개 중 1개
      • With a little force, carefully lift the lid of the speaker.

      • Make sure that you do not pull on the wires.

      댓글 쓰기

    6. Sony SRS-XB30 Bluetooth Chip Replacement: 6 단계, 이미지 3개 중 1개 Sony SRS-XB30 Bluetooth Chip Replacement: 6 단계, 이미지 3개 중 2개 Sony SRS-XB30 Bluetooth Chip Replacement: 6 단계, 이미지 3개 중 3개
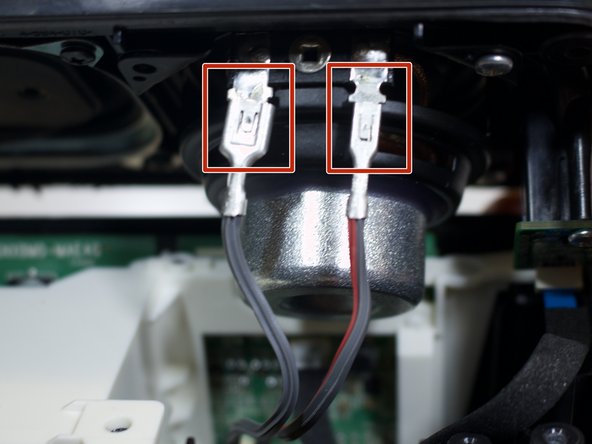
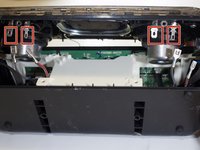
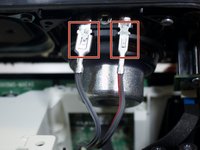
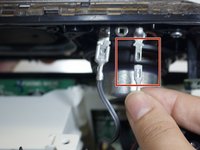
      • Unclip the four wire connectors (that are attached to the speaker lid).

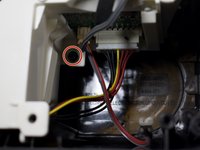
      • Disconnect the thin yellow wire (attached to the speaker lid) from its port.

      댓글 쓰기

    7. Sony SRS-XB30 Bluetooth Chip Replacement: 7 단계, 이미지 1개 중 1개
      • Separate the speaker lid from the bottom frame.

      • To prepare the speaker for the next step place the lid parallel to the frame.

      댓글 쓰기

    8. Sony SRS-XB30 Bluetooth Chip Replacement: 8 단계, 이미지 1개 중 1개
      • Locate the two silver screws (9 mm) attached to the two LED-light-chips on the speaker lid.

      • Using the screwdriver with bit PH1, unscrew each screw.

      댓글 쓰기

    9. Sony SRS-XB30 Bluetooth Chip Replacement: 9 단계, 이미지 1개 중 1개
      • Separate the speaker lid entirely from the bottom frame.

      댓글 쓰기

    10. Sony SRS-XB30 Bluetooth Chip Replacement: 10 단계, 이미지 1개 중 1개
      • Remove the top screw (10 mm).

      • Use the screwdriver with bit T7.

      댓글 쓰기

    11. Sony SRS-XB30 Bluetooth Chip Replacement: 11 단계, 이미지 2개 중 1개 Sony SRS-XB30 Bluetooth Chip Replacement: 11 단계, 이미지 2개 중 2개
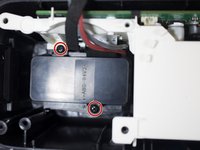
      • Locate and remove the three black screws (10.0 mm) within the internal frame. Use bit T7.

      • There are two screws on the left side of the white box and one to its right.

      댓글 쓰기

    12. Sony SRS-XB30 Bluetooth Chip Replacement: 12 단계, 이미지 1개 중 1개
      • Slightly lift the white box with all the wires still attached.

      댓글 쓰기

    13. Sony SRS-XB30 Bluetooth Chip Replacement: 13 단계, 이미지 2개 중 1개 Sony SRS-XB30 Bluetooth Chip Replacement: 13 단계, 이미지 2개 중 2개
      • Take the big spudger and pry the black casing up from the circuit box.

      댓글 쓰기

    14. Sony SRS-XB30 Bluetooth Chip Replacement: 14 단계, 이미지 1개 중 1개
      • Locate the blue film attached to the circuit box containing the charging port.

      • Detach the blue film from the box.

      댓글 쓰기

    15. Sony SRS-XB30 Bluetooth Chip Replacement: 15 단계, 이미지 1개 중 1개
      • Detach the yellow, black and red wires by pulling them directly up.

      댓글 쓰기

    16. Sony SRS-XB30 Bluetooth Chip Replacement: 16 단계, 이미지 2개 중 1개 Sony SRS-XB30 Bluetooth Chip Replacement: 16 단계, 이미지 2개 중 2개
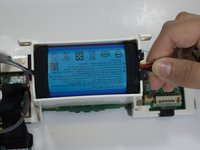
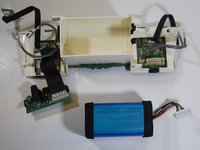
      • Insert the spudger along the battery edge and firmly hold the wires. Lift both sides up. The battery will pop out from its encasement.

      댓글 쓰기

    1. Sony SRS-XB30 Bluetooth Chip Replacement, Bluetooth Chip: 17 단계, 이미지 1개 중 1개
      • To save time, pry up and remove the top panel first.

      댓글 쓰기

    2. Sony SRS-XB30 Bluetooth Chip Replacement: 18 단계, 이미지 2개 중 1개 Sony SRS-XB30 Bluetooth Chip Replacement: 18 단계, 이미지 2개 중 2개
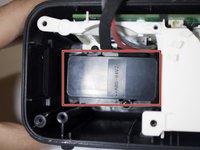
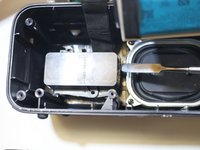
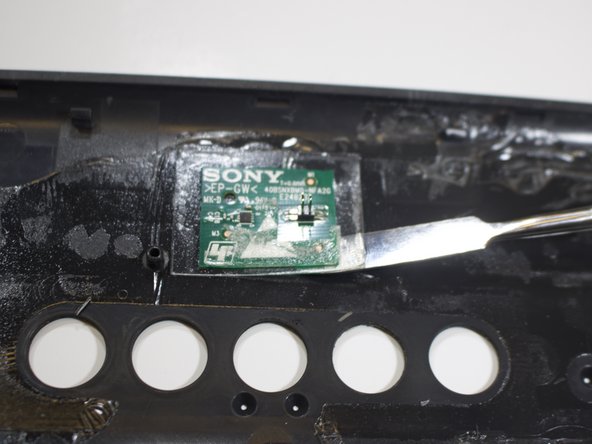
      • Take the spudger and pry under the plastic square that the Bluetooth chip is directly attached to.

      • This will separate the plastic square from the lid.

      댓글 쓰기

    3. Sony SRS-XB30 Bluetooth Chip Replacement: 19 단계, 이미지 1개 중 1개
      • Remove the Bluetooth chip.

      댓글 쓰기

결론

To reassemble your device, follow these instructions in reverse order.

취소: 해당 안내서를 완성하지 않았습니다.

다른 3명이 해당 안내서를 완성하였습니다.

작성자

3다른 기여자 명과 함께

Star Dragon

회원 가입일: 04/09/18

669 평판

안내서 3개를 작성함

1가이드 댓글

I'm pretty sure this is the nfc chip and not the Bluetooth chip

john may - 답글 공유

댓글 쓰기

조회 통계:

지난 24시간: 1

지난 7일: 10

지난 30일: 36

전체 시간: 4,302