소개
This repair guide shows how to replace your hard drive.
필요한 것
-
-
Turn the laptop upside down so that the top is sitting on a flat surface.
-
If you are looking at the bottom of the laptop the battery is located on the front right side of the laptop; the opposite side from the floppy disk drive.
 FixBot에 문의하기
-
-
-
As shown by the arrow, slide the plastic cover up and then pull out and downwards.
-
You should now be able to pull the battery out.
-
-
-
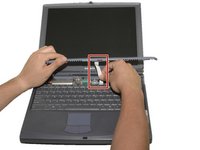
Remove the four 16 mm screws bordering the edge of the laptop using a Phillips #0 screwdriver.
-
-
-
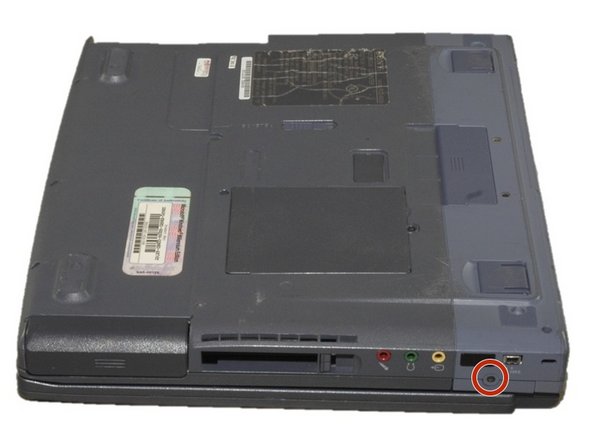
Remove the 4mm screw on the right rear side of the laptop next to the audio ports using a Phillips #0 screwdriver.
-
-
-
-
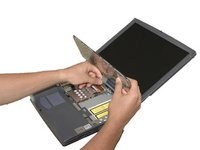
Slide the blue speaker grille (located above the keyboard) to the right and gently pull upward. The grille will still be connected by a white electrical strip.
-
Carefully pull out the white electrical strip. By doing this you will remove the speaker grille.
-
-
-
Remove the 4mm screw in the center using a Phillips screwdriver.
-
Carefully and slowly pull the green strip straight up (away from the laptop) to disconnect it. Make sure not to pull too hard to avoid breaking.
-
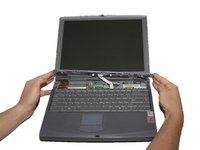
The keyboard can now be removed.
-
-
-
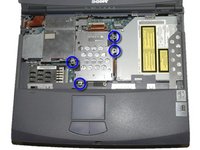
Remove the two 4mm Phillips screws in the center of the computer located on each side of the copper electrical strip.
-
-
-
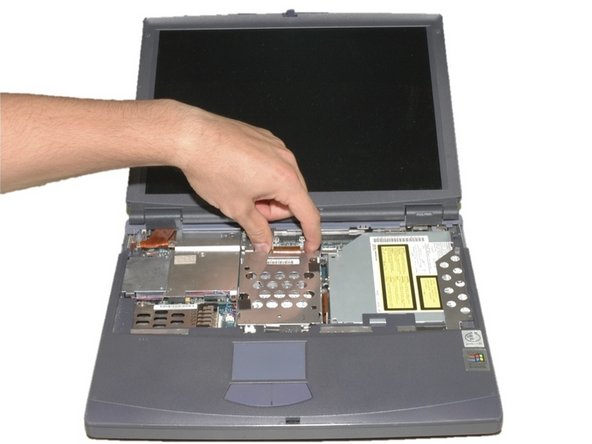
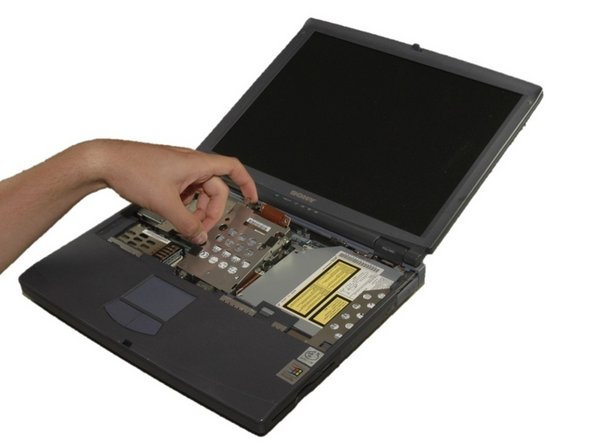
Remove the four 4mm Phillips screws around the hard drive cage.
-
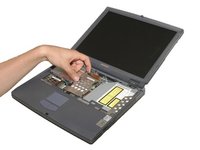
Carefully lift the hard drive cage out.
-
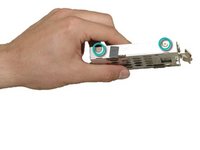
Carefully disconnect the copper strip to pull out the hard drive.
-
-
-
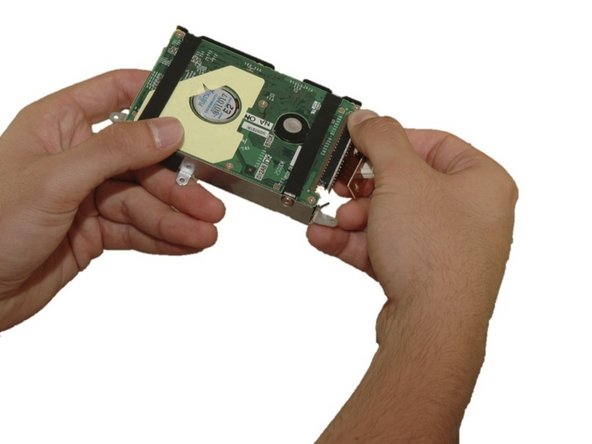
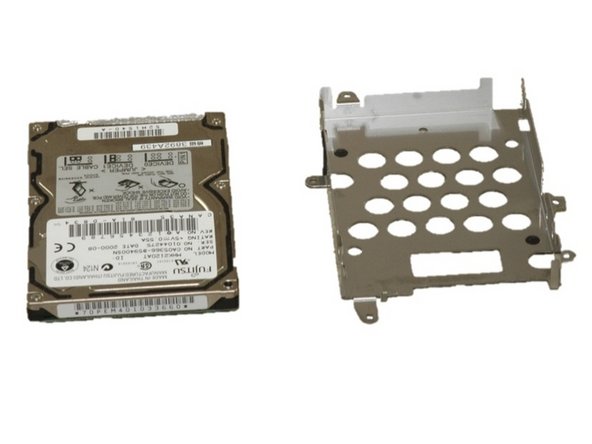
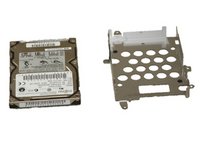
Remove the four 4mm Phillips screws that hold the hard drive in the hard drive cage.
-
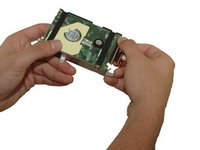
Gently remove the hard drive from the cage.
-
Gently remove the copper electrical strip from the harddrive.
-


To reassemble your device, follow these instructions in reverse order.
다른 4명이 해당 안내서를 완성하였습니다.

팀

Cal Poly, Team 12-36, Maness Spring 2011 Cal Poly, Team 12-36, Maness Spring 2011 회원
CPSU-MANESS-S11S12G36
4 회원들
안내서 16개를 작성함
3가이드 댓글
Complete Life Saver Thank you Very much for taking the time to Make an Easily Fallowed guide for this laptop. very very much Appreciated
colbailey1 - 답글 공유
would recommend getting a #00 bit for this repair just as well, some of those old screws can be a pain, if the laptop was previously opened or has wrong screws in place