소개
This guide helps users remove the plastic panel that covers the RAM compartment of the Sony Vaio VGN-FS640 laptop.
필요한 것
-
-
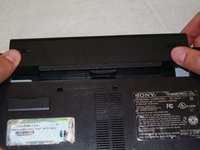
Lay the closed laptop on its screen so the bottom is facing towards you.
 FixBot에 문의하기
-
-
-
-
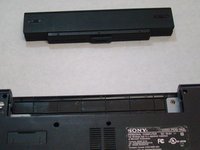
Revome the battery by pushing it away from the laptop.
-
Set the battery away from the laptop.
-
-
-
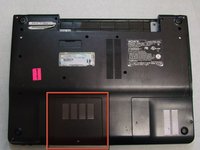
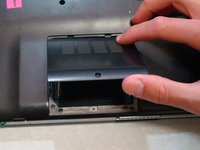
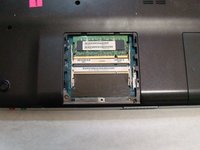
With the bottom of the laptop facing up, locate the RAM cover.
-
The RAM is covered by the panel with four columns of vents.
-
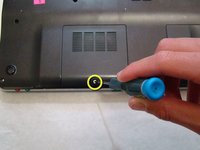
Locate the screw (Length: 4.8 mm) holding down the panel, which is near the edge of the laptop. Unscrew it with your phillips #0 screwdriver.
-
-
-
Use your fingers to slide the cover away from the laptop. (It will only slide a few millimeters)
-
Once the panel is out of its locked position, it can be lifted out without any resistance.
-


To reassemble your device, follow these instructions in reverse order.
팀

Cal Poly, Team 24-32, Regan Spring 2010 Cal Poly, Team 24-32, Regan Spring 2010 회원
CPSU-REGAN-S10S24G32
4 회원들
안내서 16개를 작성함