이 버전에는 잘못된 편집 사항이 있을 수 있습니다. 최신 확인된 스냅샷으로 전환하십시오.
필요한 것
-
-
모델 스티커가 천장을 향하도록 컨트롤러를 뒤집으세요.
-
JIS #00 스크루드라이버를 사용하여 손잡이 끝에 손잡이를 고정하는 검정색 8.4mm 나사 2개를 풀어주세요.
-
-
-
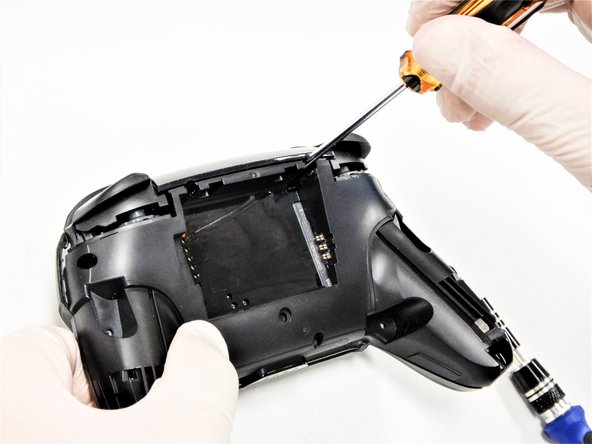
Phillips/십자 #1 드라이버를 사용하여 컨트롤러 후면에서 5mm 나사 다섯 개를 풀어주세요.
-
손잡이 위의 케이스 나사 2개와 배터리 베이 아래의 케이스 나사 1개는 얕은 위치에 있습니다. 이 나사 세 개는 쉽게 풀 수 있습니다.
-
ZR 및 ZL 숄더 버튼 옆에 있는 케이스 나사 두 개 는 깊이가 깊습니다. 이 나사에 접근하려면 연장 또는 샤프트가 긴 십자 드라이버를 사용하세요.
-
-
-
이 단계는 번역되지 않았습니다. 번역을 도와주십시오
-
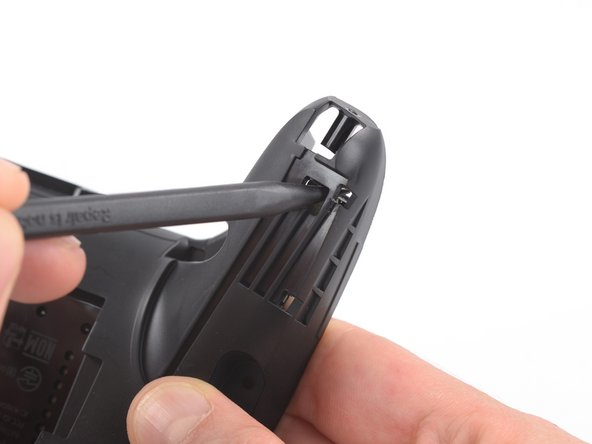
Insert the tip of a spudger from the back into the hole on the right controller handle.
-
Push the spudger through the hole to loosen the adhesive which is holding rumble modules in their places.
-
-
이 단계는 번역되지 않았습니다. 번역을 도와주십시오
-
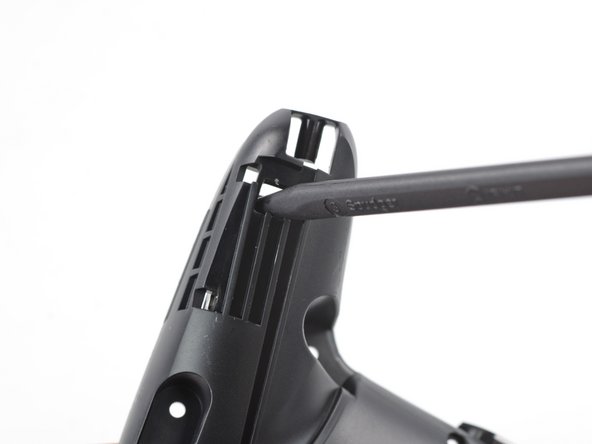
Insert the tip of a spudger from the back into the hole on the left controller handle.
-
Push the spudger through the hole to loosen the adhesive which is holding rumble modules in their places.
-
-
이 단계는 번역되지 않았습니다. 번역을 도와주십시오
-
Use a Phillips screwdriver to remove the four 5 mm-long screws securing the motherboard.
-
-
이 단계는 번역되지 않았습니다. 번역을 도와주십시오
-
Use your thumb or a pair of tweezers to to take off the white LED light housing.
-
-
이 단계는 번역되지 않았습니다. 번역을 도와주십시오
-
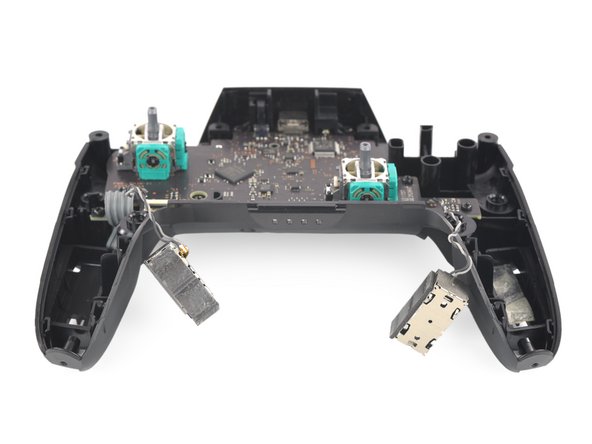
Lift the motherboard carefully as to not damage the wires and flip it to reveal the backside.
-
-
이 단계는 번역되지 않았습니다. 번역을 도와주십시오
-
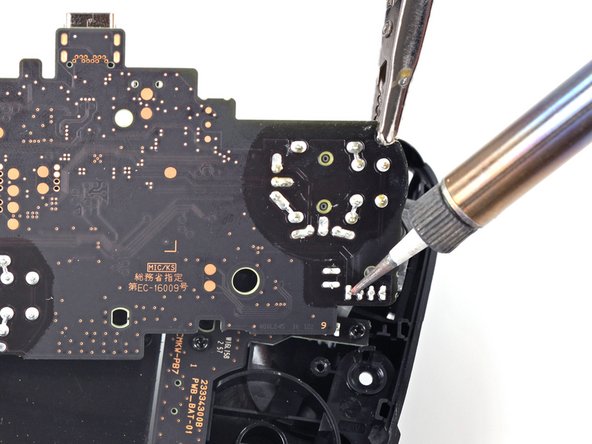
Desolder the rumble motor solder points on either side of the motherboard.
-
Remove the rumble modules.
-
-
이 단계는 번역되지 않았습니다. 번역을 도와주십시오
-
Remove the main power cable from the highlighted pins by de-soldering them.
-
Remove the motherboard.
-


다른 4명이 해당 안내서를 완성하였습니다.

팀

The Citadel Military College of South Carolina, Team S2-G9, Eggleston Fall 2020 The Citadel Military College of South Carolina, Team S2-G9, Eggleston Fall 2020 회원
CMCSC-EGGLESTON-F20S2G9
3 회원들
안내서 18개 작성하였습니다