주요 콘텐츠로 건너뛰기

Tagital T9X Screen Replacement

필요한 것

  1. Tagital T9X Screen Replacement, Back Cover: 1 단계, 이미지 1/1
    • With the tablet turned off, remove the two 5mm Phillips head screws from the top of the tablet.

    • These screws are extremely easy to lose. Be sure to store them in a safe place.

  2. Tagital T9X Screen Replacement: 2 단계, 이미지 1/1
    • Use a 1 cm wide plastic opening tool to remove the back panel. Go around the entire back panel to ensure safe removal.

    • The power, return, and volume buttons are not firmly secured to the panel; it is likely they will fall off in the process of removing the panel.

  3. Tagital T9X Screen Replacement, Battery: 3 단계, 이미지 1/1
    • Using a plastic spudger, carefully pry the battery from its position. Ensure that you do not puncture or bend the battery in this process.

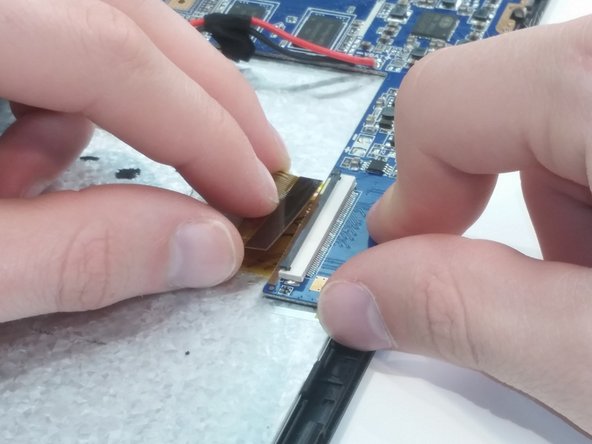
    • The only wires for removal are the red and black wires that are soldered into the battery and motherboard.

  4. Tagital T9X Screen Replacement, Screen: 4 단계, 이미지 1/1
    • Remove the four 2mm Phillips head screws from the motherboard.

  5. Tagital T9X Screen Replacement: 5 단계, 이미지 1/3 Tagital T9X Screen Replacement: 5 단계, 이미지 2/3 Tagital T9X Screen Replacement: 5 단계, 이미지 3/3
    • Locate the 2 ZIF connectors.

    • Remove both ZIF connectors by lifting the flap on the connectors and carefully removing the ribbons.

  6. Tagital T9X Screen Replacement: 6 단계, 이미지 1/1
    • Remove the motherboard and battery from the back of the screen.

  7. Tagital T9X Screen Replacement: 7 단계, 이미지 1/1
    • Using the spudger, pry the screen from its housing.

    • The display screen is secured by small plastic pieces that snap over the edges. It may be easier to start from the corner of the display screen to detach it from the touchscreen.

결론

To reassemble your device, follow these instructions in reverse order.

다른 2명이 해당 안내서를 완성하였습니다.

Christopher M Shultz

회원 가입일: 01/29/16

208 평판

안내서 2개 작성하였습니다

댓글 0개

댓글 쓰기

조회 통계:

24 시간 전: 0

7일 전: 0

30일 전: 1

전체 시간: 351