소개
If the screen of your watch has an undamaged screen that won't light up or the battery won't keep its charge, then this replacement guide is what you need. It details how to take apart your TomTom Runner watch so that you can replace the entire battery. This guide is also useful for completely replacing the Back Panel.
필요한 것
-
-
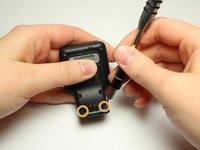
First, lift the bottom part of the band to start removing the wristband from the button area of the watch.
 FixBot에 문의하기
-
-
-
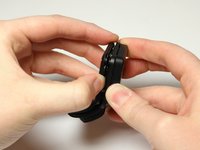
Continue to lift up on the band until the screen of the watch becomes loose from the band.
-
Continue to pull up on the wristband until it is completely off the watch.
-
-
-
-
Flip over the watch and remove the four 3.0 mm Torx head screws with a T4 Torx head screwdriver.
-
-
-
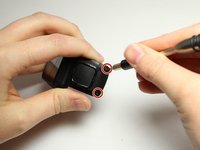
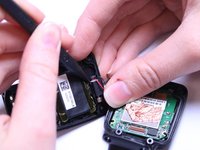
Remove the two 3.0 mm Torx screws from the front. Use a T4 Torx screwdriver to remove the screws.
-
The two 3.0 mm Torx screws are painted blue at the end. These screws have screw holders around them that will also need to be removed.
-
Unscrew the screws from the front of the watch casing and the screw holders fall out from the back of the watch casing.
-
-
-
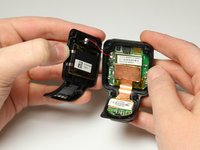
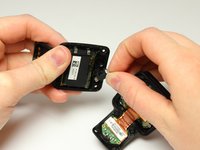
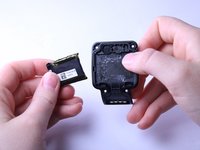
Gently wiggle the black box vibrator component away from the back panel with your fingers or a Spudger tool.
-
-
-
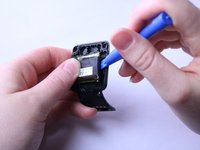
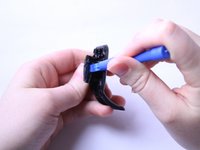
Grab the back panel and a blue, plastic opening tool to pry the black battery pack off the back panel.
-
After removing the battery, you are ready to replace it with a new one.
-
If you need to replace the back panel, you are ready to take out the old battery and place it in the new back panel.
-


This guide is complete when you have successfully removed the battery from the back panel. To reassemble your device, follow these instructions in reverse order.
다른 20명이 해당 안내서를 완성하였습니다.
팀

Texas Tech, Team S8-G6, Bennett Spring 2017 Texas Tech, Team S8-G6, Bennett Spring 2017 회원
TTU-BENNETT-S17S8G6
4 회원들
안내서 15개를 작성함
30가이드 댓글
Very nice explaination. Would be good to mention the replacementbattery.
Very hard to find on the www.
Anyone found out already?
Know it’s lithium polymer with capacity of 190 mAh / 3,7V
When size is known, a replacement must be somewere.
Can someone advise where we can purchase these batteries