주요 콘텐츠로 건너뛰기

UTStarcom CDM8945vw Logic Board Replacement

필요한 것

  1. UTStarcom CDM8945vw Logic Board Replacement, Battery: 1 단계, 이미지 1/1
    • Push the highlighted button in the direction in which the antenna is pointing. The battery will release and pop up.

  2. UTStarcom CDM8945vw Logic Board Replacement: 2 단계, 이미지 1/1
    • Remove the battery.

  3. UTStarcom CDM8945vw Logic Board Replacement, Antenna: 3 단계, 이미지 1/1
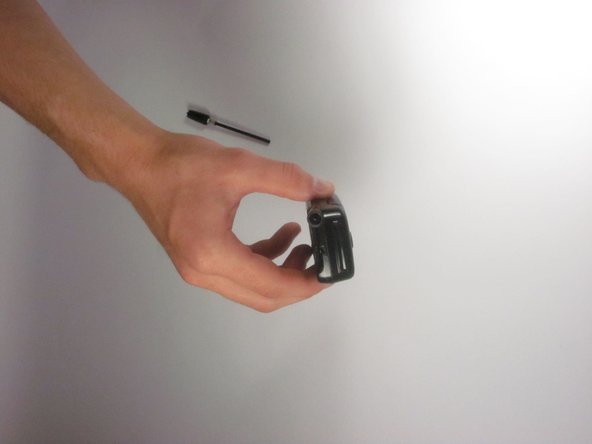
    • Identify the antenna. It is the extendable plastic component pictured here.

  4. UTStarcom CDM8945vw Logic Board Replacement: 4 단계, 이미지 1/1
    • Twist the base in a counter-clockwise motion to unscrew the antenna.

  5. UTStarcom CDM8945vw Logic Board Replacement: 5 단계, 이미지 1/2 UTStarcom CDM8945vw Logic Board Replacement: 5 단계, 이미지 2/2
    • The antenna should slide right out of the phone when finished.

  6. UTStarcom CDM8945vw Logic Board Replacement, Speaker: 6 단계, 이미지 1/1
    • Remove the small rubber grommet using the plastic opening tool.

  7. UTStarcom CDM8945vw Logic Board Replacement: 7 단계, 이미지 1/1
    • Remove five screws using a Phillips #00 screwdriver.

  8. UTStarcom CDM8945vw Logic Board Replacement: 8 단계, 이미지 1/1
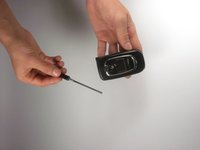
    • Use the plastic opening tool to separate the two pieces that form the outer case of the phone.

    • Prying the two pieces apart may be difficult. Carefully apply a moderate amount of pressure when attempting to separate the two pieces or else you will risk breaking them.

  9. UTStarcom CDM8945vw Logic Board Replacement: 9 단계, 이미지 1/1
    • Remove the back piece of the outer case.

  10. UTStarcom CDM8945vw Logic Board Replacement: 10 단계, 이미지 1/1
    • Remove the speaker using a plastic opening tool.

    • Apply a small amount of force when removing the broken speaker from the motherboard. If you apply a large amount of force, you may rip out the wires and damage the motherboard.

  11. UTStarcom CDM8945vw Logic Board Replacement: 11 단계, 이미지 1/2 UTStarcom CDM8945vw Logic Board Replacement: 11 단계, 이미지 2/2
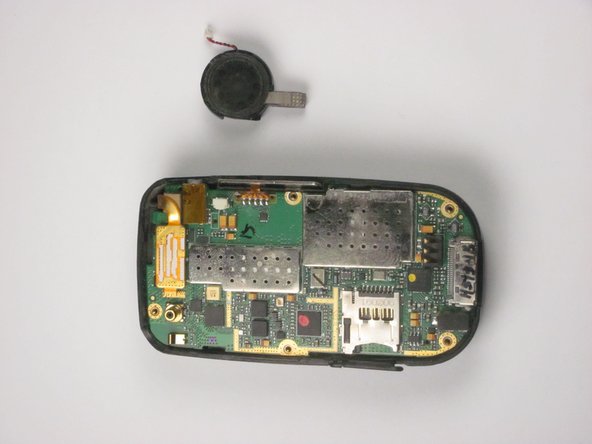
    • Remove the wire attached to the speaker from the motherboard using tweezers.

    • Apply a small amount of force when removing the wire from the motherboard. If you apply a large amount of force, you may rip out the wires and damage the motherboard.

  12. UTStarcom CDM8945vw Logic Board Replacement, Logic Board: 12 단계, 이미지 1/1
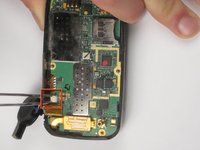
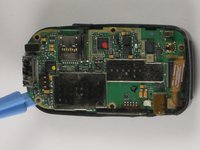
    • Detach the highlighted piece from the logic board using a plastic opening tool.

  13. UTStarcom CDM8945vw Logic Board Replacement: 13 단계, 이미지 1/2 UTStarcom CDM8945vw Logic Board Replacement: 13 단계, 이미지 2/2
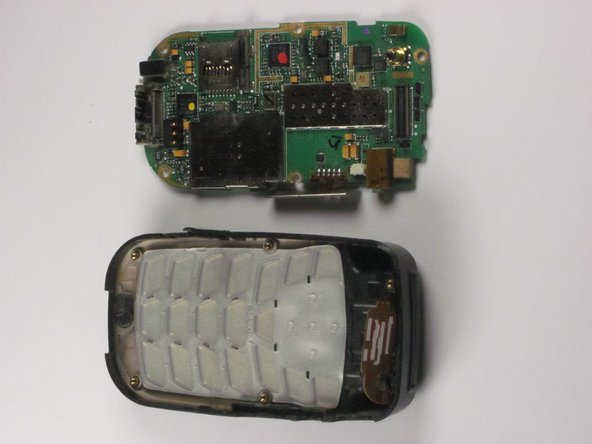
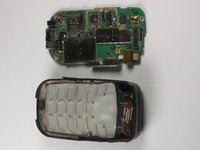
    • Remove the logic board from the anterior piece of the outer case using the plastic opening tool.

결론

To reassemble your device, follow these instructions in reverse order.

Bilal

회원 가입일: 10/04/12

1 평판

안내서 1개 작성함

Cal Poly, Team 24-26, Regan Fall 2012 Cal Poly, Team 24-26, Regan Fall 2012 회원

CPSU-REGAN-F12S24G26

4 회원들

안내서 10개 작성하였습니다

댓글 0개

댓글 쓰기

조회 통계:

24 시간 전: 0

7일 전: 0

30일 전: 1

전체 시간: 301