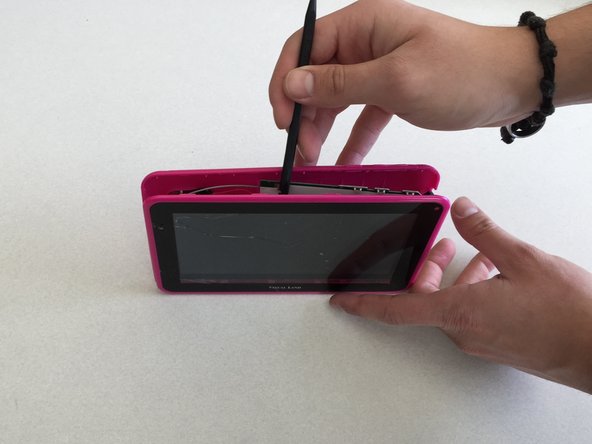
주요 콘텐츠로 건너뛰기

Visual Land Prestige 7L Back Panel Replacement

필요한 것

  1. Visual Land Prestige 7L Back Panel Replacement, Back Panel: 1 단계, 이미지 2개 중 1개 Visual Land Prestige 7L Back Panel Replacement, Back Panel: 1 단계, 이미지 2개 중 2개
    • Remove the two 8mm Phillips Head screws located at the bottom of your device.

  2. Visual Land Prestige 7L Back Panel Replacement: 2 단계, 이미지 3개 중 1개 Visual Land Prestige 7L Back Panel Replacement: 2 단계, 이미지 3개 중 2개 Visual Land Prestige 7L Back Panel Replacement: 2 단계, 이미지 3개 중 3개
    • Insert the spudger between the two pieces of the case around the media ports and pry them apart.

    • We found the best way to get the spudger inside the case was to insert in into the SD card slot. Be sure to only insert the spudger a shallow amount and be careful not to damage any of the inside of the device.

    • Finish unsnapping each plastic piece holding the device together along the bottom.

  3. Visual Land Prestige 7L Back Panel Replacement: 3 단계, 이미지 3개 중 1개 Visual Land Prestige 7L Back Panel Replacement: 3 단계, 이미지 3개 중 2개 Visual Land Prestige 7L Back Panel Replacement: 3 단계, 이미지 3개 중 3개
    • Move the spudger down the rest of the case, separating each side, and finally the top.

    • Pull the back off and place it to the side.

    • Without a back panel for protection, be sure place your device on the table screen-side down to avoid damaging the internal circuitry.

결론

To reassemble your device, follow these instructions in reverse order.

다른 한 분이 해당 안내서를 완성하였습니다.

작성자

3다른 기여자 명과 함께

Robert

회원 가입일: 01/28/15

141 평판

안내서 1개를 작성함

Penn State, Team 2-25, Kaschak Winter 2015 Penn State, Team 2-25, Kaschak Winter 2015 회원

PSU-KASCHAK-W15S2G25

4 회원들

안내서 4개를 작성함

0가이드 댓글

댓글 쓰기

조회 통계:

지난 24시간: 0

지난 7일: 0

지난 30일: 3

전체 시간: 599