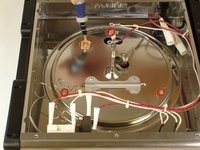
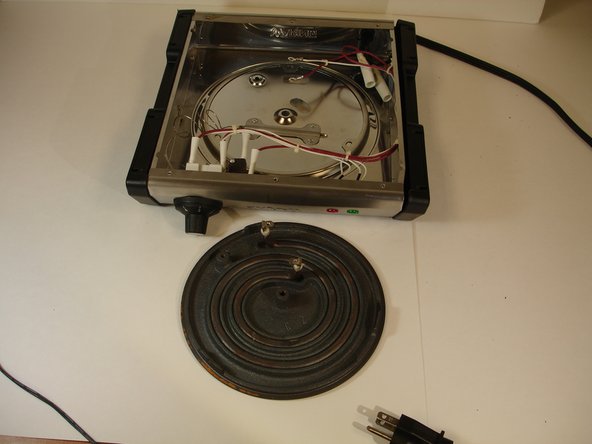
주요 콘텐츠로 건너뛰기

Waring Pro SB30 Hot Plate Replacement

필요한 것

  1. Waring Pro SB30 Hot Plate Replacement, Back Panel: 1 단계, 이미지 1/1
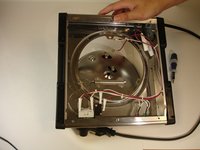
    • Remove the screws on the back panel with the #1 Phillips screwdriver bit.

    • The screws in the rubber legs of the burner do not need to be removed.

    • If the back panel has never been opened before, the screws may be more difficult to unscrew.

  2. Waring Pro SB30 Hot Plate Replacement: 2 단계, 이미지 1/2 Waring Pro SB30 Hot Plate Replacement: 2 단계, 이미지 2/2
    • Using a wrench, remove the bolt from the center of the back panel.

  3. Waring Pro SB30 Hot Plate Replacement: 3 단계, 이미지 1/1
    • The back panel can now be easily lifted off.

  4. Waring Pro SB30 Hot Plate Replacement, Hot Plate: 4 단계, 이미지 1/2 Waring Pro SB30 Hot Plate Replacement, Hot Plate: 4 단계, 이미지 2/2
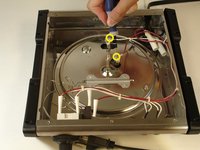
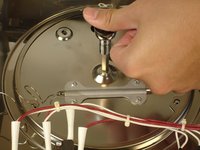
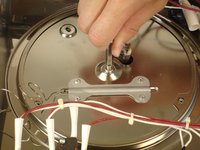
    • Remove screws #1 Phillips screwdriver bit.

    • The interior edges of the metal frame are sharp and can cause minor cuts.

    • 3 screws on the perimeter of the circle

    • 1 screw in the circle

    • 2 screws on the eletrical stands with wires

  5. Waring Pro SB30 Hot Plate Replacement: 5 단계, 이미지 1/2 Waring Pro SB30 Hot Plate Replacement: 5 단계, 이미지 2/2
    • Remove rod from the center of the plate with a wrench.

  6. Waring Pro SB30 Hot Plate Replacement: 6 단계, 이미지 1/2 Waring Pro SB30 Hot Plate Replacement: 6 단계, 이미지 2/2
    • Remove plate carefully as to not damage internal components i.e. insulator, metal frame, wires, etc.

결론

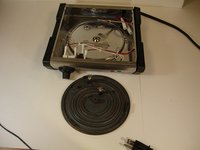
To reassemble your device, follow these instructions in reverse order.

다른 2명이 해당 안내서를 완성하였습니다.

Sun Fai Lau

회원 가입일: 09/22/14

588 평판

안내서 5개 작성하였습니다

USF Tampa, Team 10-7, Brown Fall 2014 USF Tampa, Team 10-7, Brown Fall 2014 회원

USFT-BROWN-F14S10G7

3 회원들

안내서 5개 작성하였습니다

댓글 0개

댓글 쓰기

조회 통계:

24 시간 전: 0

7일 전: 3

30일 전: 11

전체 시간: 1,934